I understand that a lot of people get stressed by air travel these days and particularly by getting through security, but I don’t think that the security process needs to be that difficult. Some knowledge and planning will help you sail through security.
Weeks Ahead
Luggage
I don’t check luggage but always do carry-on. I do this because it can easily save me an hour of waiting on line or waiting for my bags. It also means I never have to deal with lost luggage. But I do have to be able to lift up my own bag into the overhead bins. That is not the job of strangers on the flight and certainly not the job of the flight attendants.
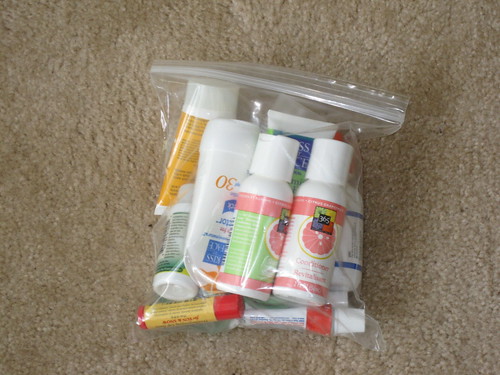
You need to decide if you will check luggage or carry-on. If you are going to carry on your bag you will need to have all your liquids in containers of 3 oz or smaller and all of your liquids will have to fit in a one-quart bag. Exceptions are made for baby formula and saline for contact lens wearers. Also, consider that your luggage will be handled by strangers. Things getting stolen from checked luggage is not to be expected but neither is it as rare as I would like.
This is a decision you need to make the night before your travel unless it means that you don’t have the right suitcase. Especially if you are going to carry on your suitcase you need to make sure you have a suitcase that will conform to standard carry-on sizes which is usually 22 inches by 9 inches by 14 inches (Airline Baggage Fees and Policies with Chart).
Even if you are checking your luggage think about how little you can take instead of how much. You will save money on tips, on baggage fees and you will save your back. Going on a cruise and you want to dress up for dinner? Compare the price of renting a tux on the boat to additional luggage fees.
You can also decide to ship packages ahead of time. This can be useful especially if you are flying for the holidays. If you are traveling at the holidays, packages go in your suitcase unwrapped or you may need to unwrap them at security.
Other Issues
If you are traveling out of the country make sure your passport is current. Be aware that if you only have a month or so on your passport but it will still be valid at the time of your trip you might still have difficulties because some countries don’t like the idea that you are traveling on a passport that is about to expire. Now is a great time to make sure you know where your passport is and when it expires.
The Week Ahead
I think everyone should have a packing list. With a good packing list that I have used time and time again, I can pack for a trip in 15 minutes and not stress about whether I forgot something important. My list changes over time as I get new gadgets or stop using old ones or as I learn from previous trips. I have a place on my list for things I need when I go someplace cold and a different section for when I go someplace warm. A week before your trip is a great time to think about your list. (Here is what I pack). Do you have everything you need for your list? Do you have travel-sized liquid containers if you decided to travel with a carry-on suitcase?
Plan your laundry for the week so that you have clean clothes to pack.
As long as you are in planning mode, call your credit card company and let them know you will be traveling, put a hold on your mail or newspaper so that they don’t pile up and announce you are on vacation.
Put your suitcase out sometime this week and you can drop some things in that you won’t need this week as you think of them.
The Day Before
24 hours before your flight, you can check-in online. If you are using carry-on luggage you may be able to print your boarding pass or get the electronic version of the boarding pass on your phone. This is the last good chance to check your seats on the airplane and see if a better seat opened up. This is also a good opportunity to make sure your frequent flier number is on your reservation. If you have a CLEAR card (a get into the country quick pass) add a known traveler number to your reservation before you print your boarding pass.
Don’t forget to add your passport to your packing list if you are traveling out of the country.
It is time to pack. I recommend you pack one personal item and one carry-on bag. Even if you check luggage a personal item like a backpack or day bag is a good idea. Make sure any medication you might need, any paperwork like your passport or directions to your hotel are in your personal item and are not checked. If you are taking a long flight consider adding a toothbrush to your backpack. You might also consider packing clean underwear and a clean shirt in your backpack. Also, put in whatever you will need to entertain yourself or those you need to entertain (children or those who behave like children) in your personal bag. I keep my laptop (MacBook Air) and iPad in my backpack. My iPad will be loaded with TV shows, movies, and books by this point.
You probably get dressed every day of the year but likely don’t own 365 different outfits. Just because you are planning a month-long trip does not mean you have to pack 30 different outfits. I never pack for more than 7-10 days before I have to do laundry. I am trading off the inconvenience of laundry vs the cost and weight of more clothes. Pack as few shoes as you can live with and before you pack them stuff things inside them like underwear and socks. I roll my clothes before putting them in the suitcase and bring a large plastic laundry bag to keep the smell of dirty clothes from the clean ones. Another advantage of laundry once a week or so is that you are not carrying clothes that have been dirty for a month. Ick.
Keep in mind the weight limits on your suitcase. This varies by airline and is often less for budget carriers. If there is any question about whether your bag is overweight find it out while you are still home and can repack. Some airlines also enforce a weight limit on your personal item although most just require that it will fit under the airline seat in front of you.
If you are in the United States or the United Kingdom (England, Scotland, Wales, and Northern Ireland) choose shoes to wear to the airport that can be easily removed and put back on. In the USA, if you have “TSA Pre” on your boarding pass you won’t have to take off your shoes unless you wear shoes like work boots or some other hiking boots that have metal in them and will set off the metal detector. Plan your wardrobe also to include less metal jewelry tomorrow. You would be amazed at what people try and wear through the metal detector.
Set aside pants for tomorrow that will stay up even if you have to take off your belt.
If you are not checking a bag put your zip lock bag of liquids in the outside pocket of your suitcase, or in your day bag or backpack. You will want to be able to get to it quickly in security. If you are checking a bag put all liquids you won’t need on the plane in your checked bag instead.
Arriving at the Airport
For a domestic flight, I try and arrive at the airport one hour before my flight for domestic and two hours before my flight for international. If you are checking luggage or flying at a particularly busy time, then allow more time. Getting to the airport early is the best way to make the process less stressful. I have seen lines for checking in a bag or for security as long as an hour near Thanksgiving or Christmas.
If you are checking luggage you will make your way to the check-in counter at the arrivals portion of your airport (often the second floor). Find your airline and possible destination and get in the queue. Have your photo id ready to present at the counter. You won’t generally need anything else these days but just say where you are going and give them your photo id.
If you are traveling domestically and are not checking a bag you can go directly to security, but if you are traveling internationally you may need to stop and show your passport at the check-in desk.
Security
Security is pretty similar around the world with a few differences I will point out for the USA and the UK.
Your job in security is to make life easy for you and for those around you by being more prepared and more aware. This is not a great time to be making a call or catching up on a podcast, at least not when you are interacting with the security staff.
The first person you will encounter at security will likely want to see just your boarding pass. If you are in the United States they will be checking to see if your boarding pass is labeled “TSA Pre”. If it is, then proceed to that security area which has a different set of rules. If you purchase the CLEAR card it also comes with the privilege of using TSA Pre when you travel, but be aware that TSA Pre may also be randomly assigned on your boarding pass.
You will have two different lines that you will go through, one at a time. The first one will be to show your passport or other photo id and boarding pass to the security personnel (in the USA the TSA, Transportation Security Authority). The second one will be to actually pass through the metal detector or body scanner.
Most countries don’t allow liquids these days except for your 3 once / 100 ml containers in your one quart / 1-liter plastic zip lock bag. Before you get on the line empty your water bottle or plan on drinking it before you get to the scanner. You can still have an empty wattle bottle and I recommend it. In most developed countries there will be a drinking fountain after security where you can refill your water bottle.
Regular Security Line (Not TSA Pre)
You will usually have some time in the line and this is a great time to get ready. I take off my belt, and take everything out of my pockets, and put them in my day bag, my backpack. Check your pockets for spare change, keys, etc. If the airport is using full-body scanners you need to have nothing at all in your pockets so I just routinely do that.
By the time you get to the security personnel, the only thing you will have out will be your passport or id card and your boarding pass. Have your passport opened to your photo page, use your boarding pass as a bookmark,
After your paperwork is checked, put that away in your day bag/backpack as well.
Everything you brought with you will now go through the x-ray machine and you will go through a scanner (either a metal detector or a full-body scanner). Take your liquids out of your bag and put them in a bin. Take off your shoes if you are in the USA or the UK and put them in the same bin. Take off your coat and add it to the bin. If you have a laptop you will need to take it out and put it into its own bin. In some countries like the USA, a tablet-like an iPad will also need to come out of your bag and be placed in a bin.
In some airports, everything will go in a bin including your day bag/backpack, but not in all airports, usually not in U.S. airports. Look to see what the people ahead of you are doing.
I usually have 4 items on the conveyor belt for security. A bin with my liquids and shoes goes first, then the bin with my laptop, my backpack and lastly my suitcase. This puts the valuable items in the middle. I do this because it lets me keep a better eye on my valuables while they are not in my hands and while I am on the line for the scanner. You are responsible for making sure your items get all the way into the scanner unless told otherwise by the security personnel. Don’t just walk away from your items, especially your valuables, and assume the person behind you will push it into the scanner. Firstly, that’s just rude. Secondly, items are stolen at security areas. Yours won’t be because you are paying attention.
TSA Pre Security Line
You will usually have some time in the line and this is a great time to get ready. I take off my belt, and take everything out of my pockets, and put them in my day bag, my backpack. Check your pockets for spare change, keys, etc. If the airport is using full-body scanners you need to have nothing at all in your pockets so I just routinely do that.
If you are in the USA at a TSA Pre line then the rules are a bit different than above.
By the time you get to the security personnel, the only thing you will have out will be your passport or id card and your boarding pass. Have your passport opened to your photo page, use your boarding pass as a bookmark,
After your paperwork is checked, put that away in your day bag/backpack as well.
Everything you brought with you will now go through the x-ray machine and you will go through a scanner (either a metal detector or a full-body scanner). You will leave your shoes on. You will leave your laptop in your bag. You will leave your liquids in your bag. You will still need to empty your pockets, but you did that already.
Scanner
Get on the queue for the scanner or the metal detector. Wait for the security person to signal it is your turn to enter the scanner.
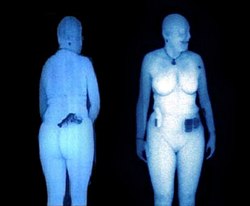
Full Body Scanner: If you are in a U.S. airport and you don’t want to go through a full-body scanner you can opt for a pat-down instead (usually by a member of your same-sex). Enter the scanner, place your feet on the yellow footprints, raise your arms above your head. Just watch the people in front of you and do what they do.
Metal Detector: If you are passing through a metal detector you should be good to go. Your pockets are empty, you didn’t wear your Mr. T metal necklaces and you removed your belt with its big WDW championship buckle. If you have a metal hip or something that will set off the metal detector you can expect to have to have a pat-down.
Reclaim your belongings
Try and be quick and get out of the way of the people behind you. The conveyor belt of people’s stuff keeps moving. Grab your stuff and move as far down the belt as you can. As you empty bins, combine them or return them to get the empty bins off the conveyor belt. I like to just grab my stuff and move off. Most airports have benches or chairs just past security where you can take your time getting shoes on, getting your stuff back in your pockets, re-stowing your liquids, etc.
If you forget some of your belongings, the TSA in the United States has a separate lost and found then the airport lost and found. They will mail you that coat you left at security at your expense. Don’t ask me how I know.
You are through security. Re-fill your water bottle. Buy some food. Use the restroom. Check the monitor for your gate. Watch the planes. You are good to go!
- Get a Car Rental
- Search for Great Tours HERE
- Buy Travel Insurance
- Book Your Accommodation HERE
+Chris Christensen | @chris2x | facebook
6 Responses to “The Definitive Guide to Airport Security and the TSA”
Leave a Reply
Tags: air travel, article, featured, travel 101, travel tip, tsa


 Speed Through Security in the Airport
 How to Plan for a Long Trip – The Definitive Guide
 Luggage Fees – Rookie Traveler Tax
 Are Full Body Scanners the Right Solution?
How to Plan for a Long Trip – The Definitive Guide – wendyslittleworld
Says:February 16th, 2018 at 11:04 pm
[…] The Definitive Guide to Airport Security […]
Leon DeHaven
Says:October 15th, 2018 at 3:46 pm
Despite all of the nice articles about TSA lost and found–
they don’t do that anymore– so in order to get my phone
that I left in a bin– I have to go to an airport police office
which is not at the airport and not in the town I live in-
and they are not sure if they have it ….
chris2x
Says:October 15th, 2018 at 5:41 pm
It depends on the airport https://www.tsa.gov/contact/lost-and-found
Samuel
Says:February 21st, 2020 at 9:41 pm
I am considering Global Entry. Anyone have any experience with this?
I think it’s $100 for one or two years. Good for US. citizens traveling back into the States and avoiding long custom lines. Especially if your flight gets in late at night. I’ve spent hours on customs lines before because there would be usually more than a few international flights arriving.
Chris Christensen
Says:February 21st, 2020 at 10:38 pm
I had it for a while. It only saves you time in most cases if you take carry-on luggage. Otherwise, I find that I get through customs faster and then just wait for my bag with everyone else.
Fehima
Says:March 21st, 2020 at 9:03 am
I heard a lot of scary stories about the TSA. This post definitely helped getting rid of rumors or at least exaggerations. Thank you! 🙂