
Banff is one of the most popular areas to visit in the Canadian Rockies. It is not by any means undiscovered so some planning and some early mornings will be recommended by this itinerary.
To give some context, I took this trip with my best friend. We are in our mid 20’s, healthy, and active individuals. This itinerary is busy. Every day is packed full of activities. You will be on the go pretty much nonstop (no, it wasn’t a dead sprint the entire time but there wasn’t a ton of downtime between activities).
If you are someone who prefers relaxing for a day or two with not much on the agenda, someone who is not highly active, or someone with a physical disability, this itinerary isn’t for you. There are a lot of things to do in the Banff area and we wanted to accomplish as much of it as possible in our 4 days, and that’s what we did with this itinerary. We do not feel as if there was anything we missed out on.
Table of contents: ()
4 Days in Banff
Day 1 – relatively light day
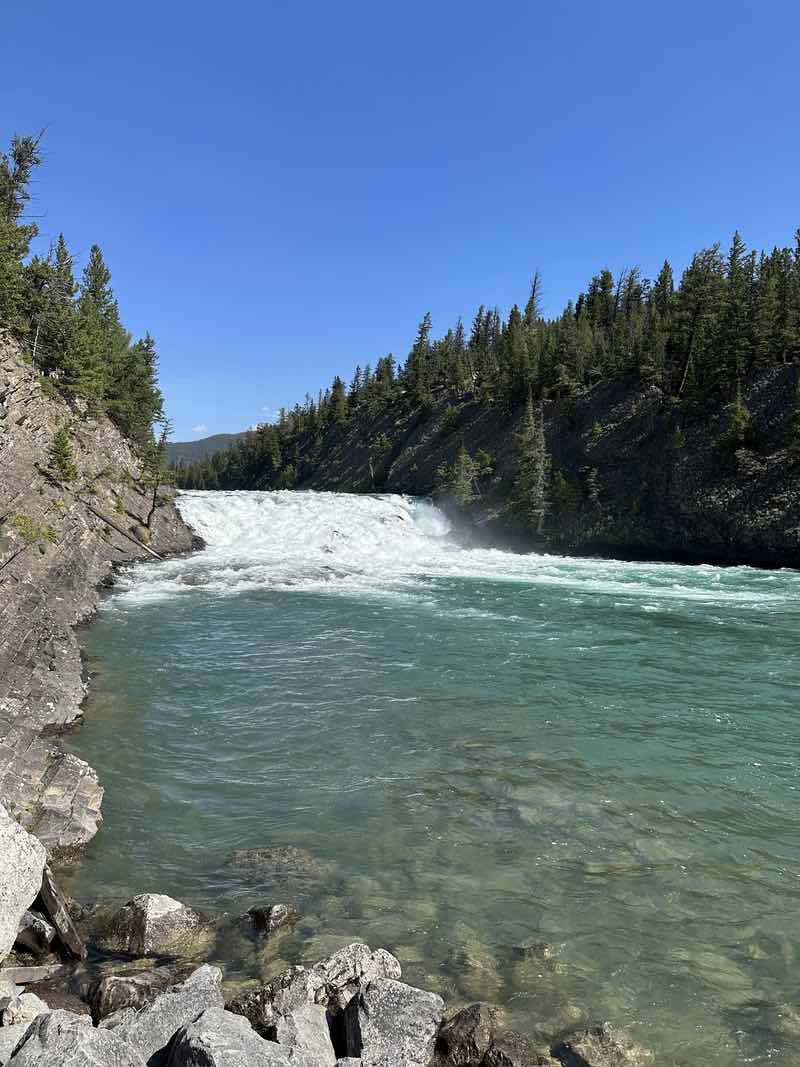
Bow Falls
Bow Falls can be accessed either from the back of the Fairmont Springs hotel (~5min easy walk) or from the trailhead in downtown Banff (~45min easy hike). We drove to the Fairmont Springs hotel and walked to Bow Falls from there, then explored the hotel a bit after. Anticipate about 60-90 minutes for this. If you choose to take the trail from downtown Banff, once you arrive at the Falls, continue to hike along the river beyond the main “scenery” area until you are behind the Fairmont Springs Hotel. It’s much quieter back there and very pretty.
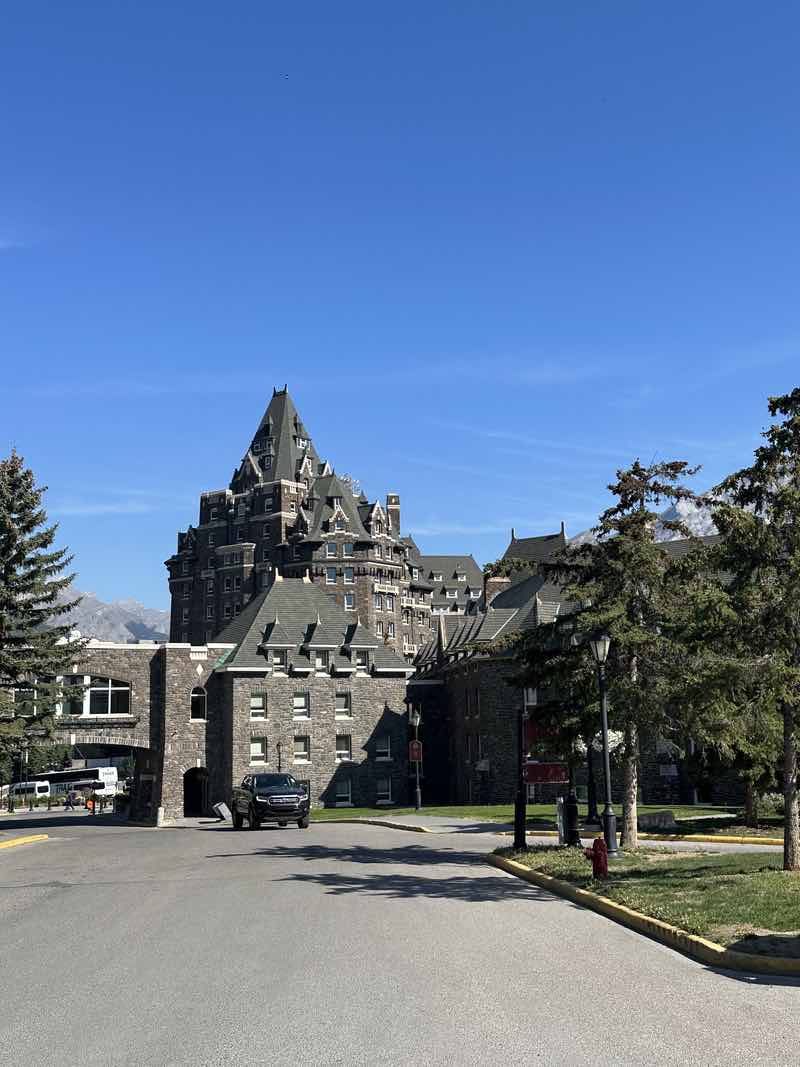
Fairmont Springs Hotel (Optional)
From there you can take the paths up to the hotel and explore for a bit, then take the trail back into town. You will not need your hiking boots for either of these options.
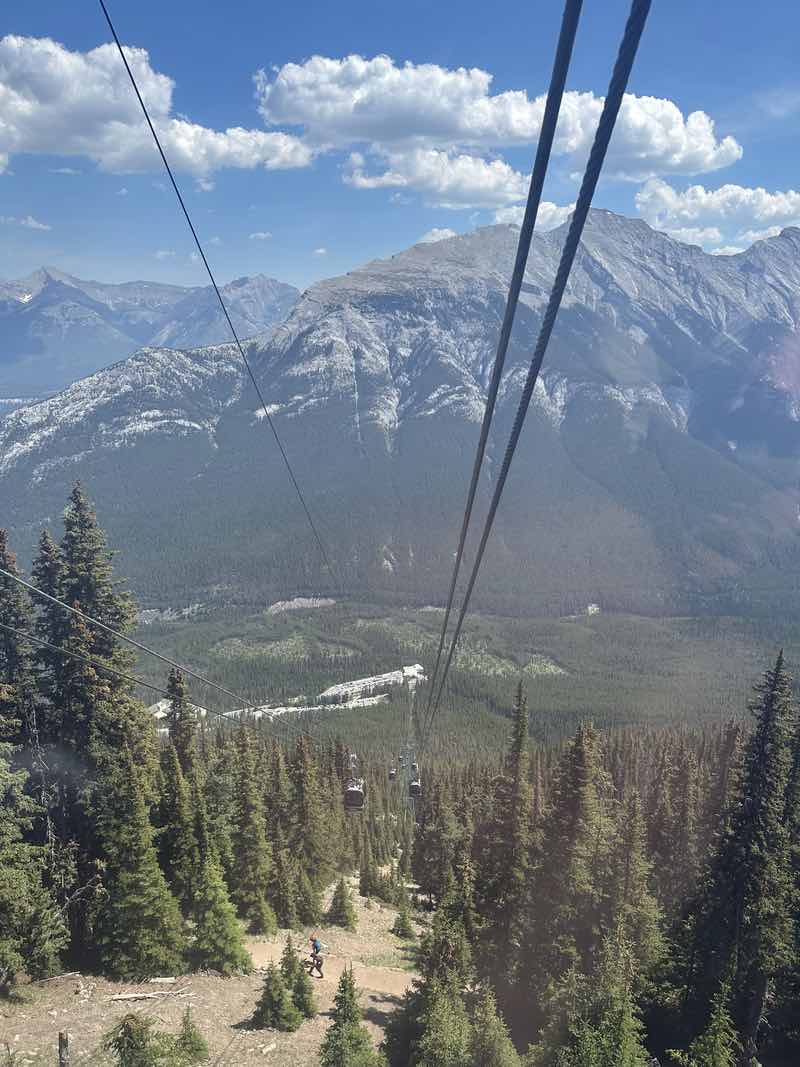
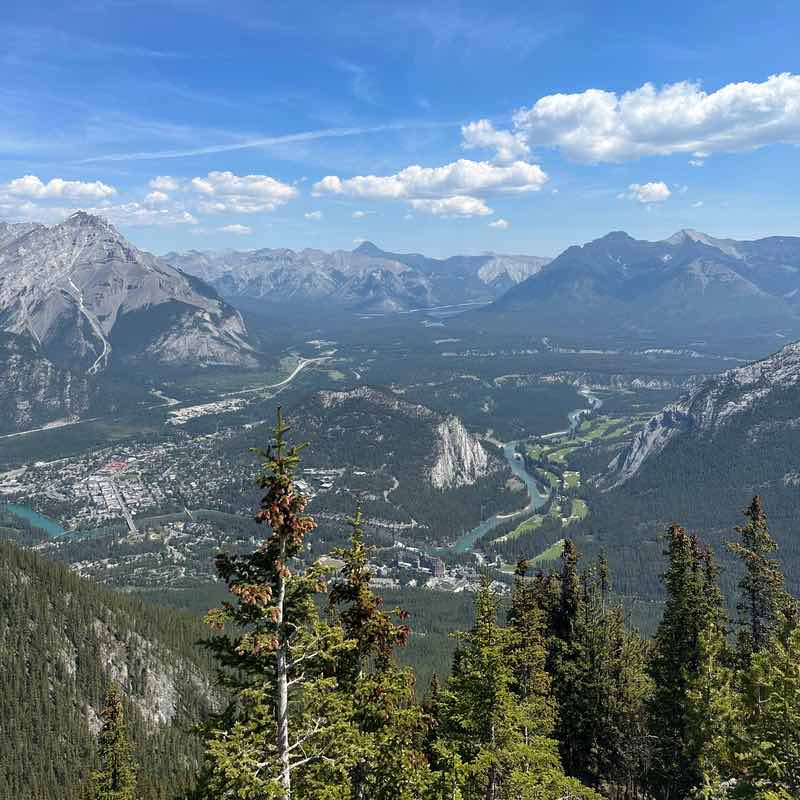
Banff Gondola
The Banff Gondola ascends Sulphur Mountain for great views of Banff. It costs ~$60 USD per person for a round trip. It’s roughly a 10-minute gondola ride each way. There’s a little visitor center at the top with a mini museum, a shop, and a few restaurants. There is a boardwalk that will take you to the lookout point – it’s about a 10-minute walk from the visitor center/gondola drop-off to the lookout point.
We planned to eat lunch here but one of the restaurants was completely full and the other was closed. The lookout point is basically a panorama of all of Banff, which was cool to see but definitely not one of the most significant views you will see on the trip. We spent ~25 minutes at the top hiking to/from the lookout point and taking pictures, but then were basically ready to head back down right away.
Because we weren’t able to eat lunch at the top and didn’t spend a ton of time, we ultimately didn’t think it was worth the $60. There is a trail that runs from the bottom of the hill (near the gondola pickup spot) to the lookout point above, so if you’re looking for more of a hike on this day then I would recommend that option (oh, and it’s free).
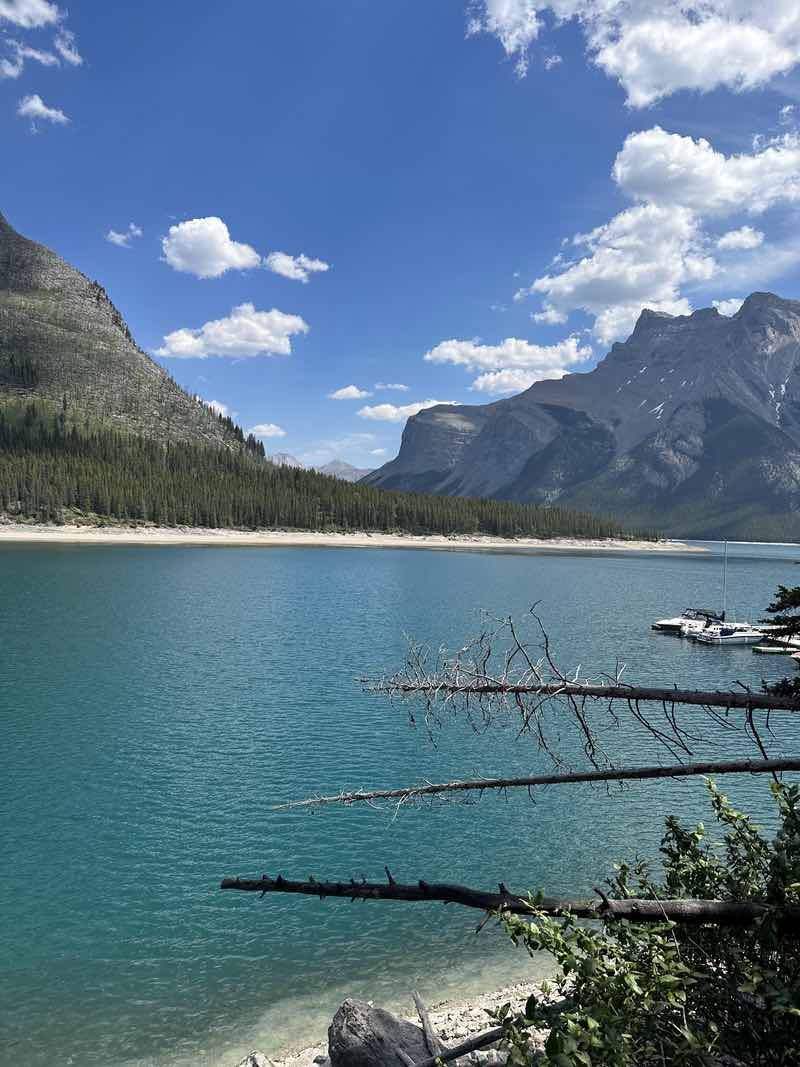
Lake Minnewanka
Lake Minnewanka is about a 15-minute drive from downtown Banff and was definitely pretty to see but wouldn’t say it’s a “must-see”. The Lake Minnewanka Lakeside trail follows along the lake and is an easy hike, but it is not a full loop around the lake. If you decide to hike it, you will walk as far as you want until you’re ready to turn back. We walked about 20-25 minutes on the trail and then decided to turn back as we felt like we had seen everything there was to see.
If you don’t feel like hiking the lake, you could minimally drive by it as the road is quite pretty and this is where we saw the majority of the wildlife (bighorn sheep and elk). This lake is close to Johnson Lake so you could combine this visit with the Johnson Lake visit (see Day 4). Optional things to do here: rent a kayak or mini boat, do a lake boat ride/tour with Pursuit Collective.
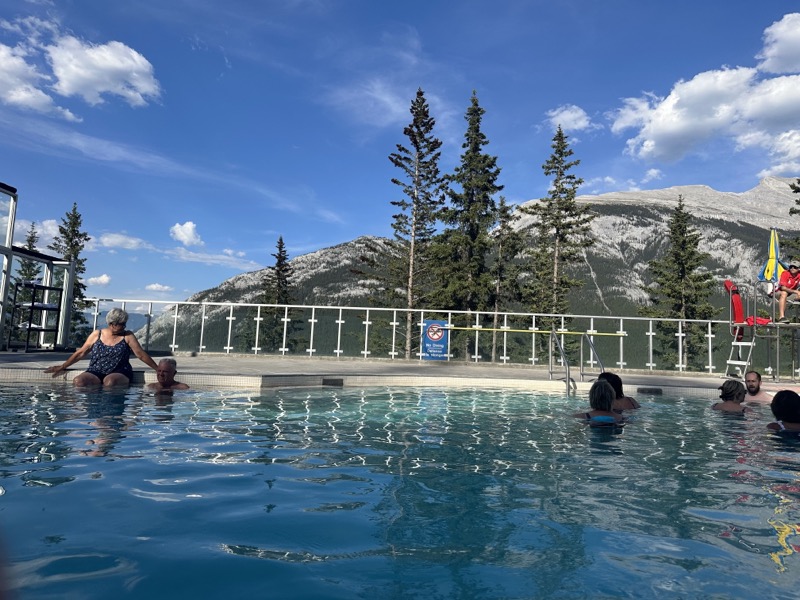
Banff Hot Springs
I’m going to be real honest here, the Banff Hot Springs is literally just a hot tub that is kind of sort of in the mountain. When I heard “hot springs” I was expecting some natural hot bath located within the mountains. This, unfortunately, was not that. It was a hot tub built on the side of the hill and the views were only mediocre. Now I will say it was cheap (~$15 USD per person) and truthfully quite relaxing, but it was not at all what I was expecting it to be.
After a late night of traveling and being on our feet most of the day, it was quite nice just to sit in the hot tub and relax. If this sounds like something you’d enjoy, by all means, do it, but you also aren’t missing much if you choose to skip it. The hot springs are located in the same spot as the Banff Gondola, but they do have their own parking lot that is quite small. If you’re going during the busy hours of the day you may have to take public transportation there, but we arrived around 6:30 pm and didn’t have any issues getting a spot in the parking lot. Be aware that the hot springs close at 8:00 pm.
Explore Banff
With whatever time and energy you have left in the day, and if you haven’t already, explore Banff. You’ll have to pay to park on the street, but it’s pretty cheap – maybe $5-7 USD for several hours. Walk the streets, and find dinner. You really can’t go wrong with anywhere you pick.
Day 2 – relatively taxing day
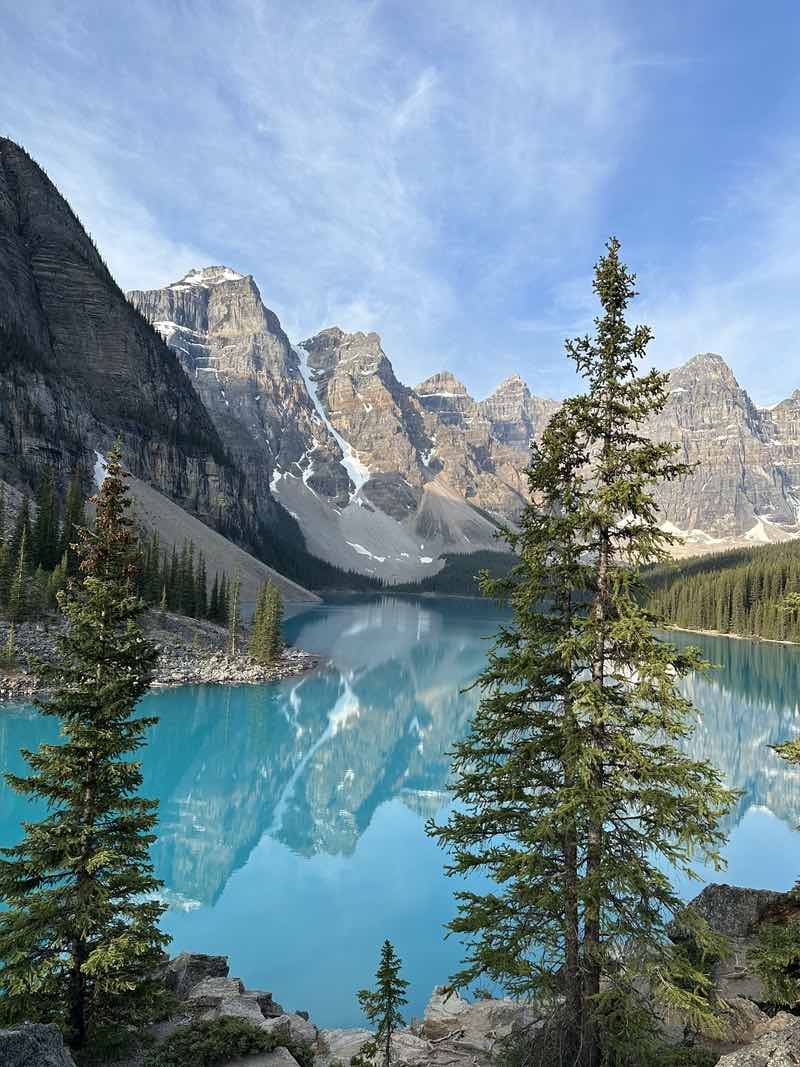
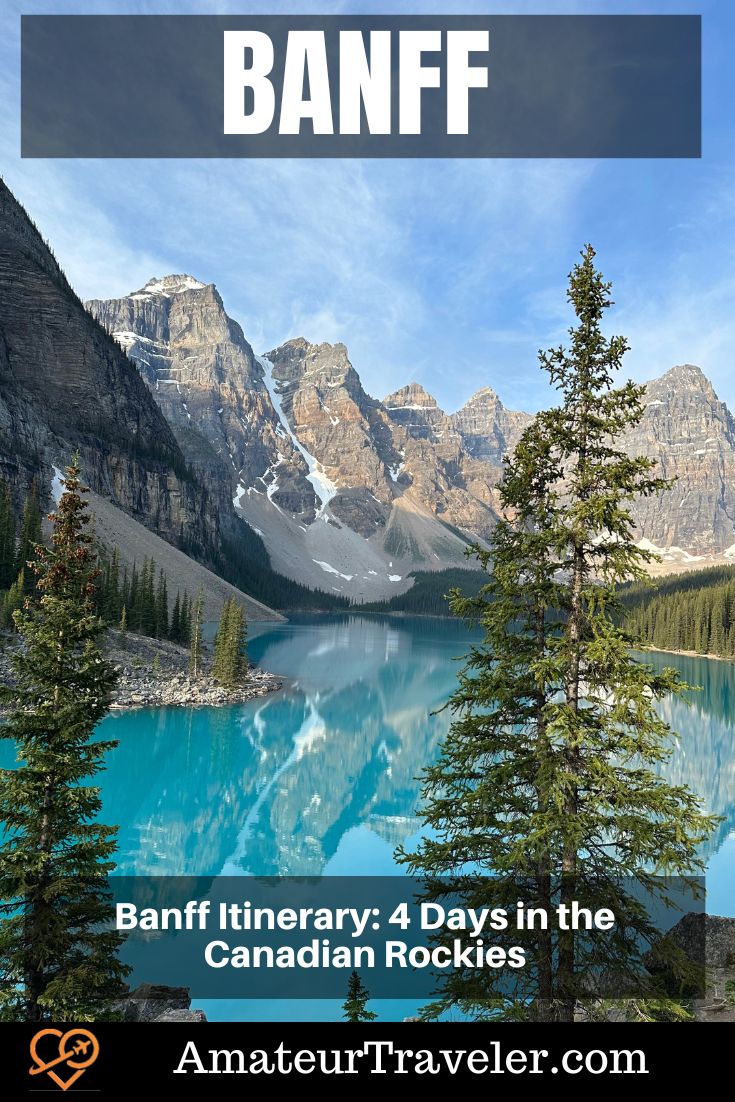
Moraine Lake
The road to Moraine Lake closes during the peak summer season, so you will more than likely need to rely on public transportation to reach this lake. Lake Louise is accessible via car, but if you plan to do both lakes on the same day then I would highly recommend using public transportation as it is easy and cheap. Use Parks Canada Reservation Service to book a shuttle/bus ticket from the Lake Louise Ski Lodge (do this ahead of time and make sure you bring either the printed tickets or a downloaded version with a barcode on your phone). The shuttle was ~$16 USD for 2 people.
You will park at the Lake Louise Ski Lodge and then take the shuttle to either Lake Louise or Lake Moraine (you pick once you arrive). Your ticket allows you to take the shuttle between lakes later in the day, too, so you don’t need to buy any additional tickets for that. Schedule an early pickup time from the ski lodge so you can get to the lakes early.
We scheduled our pickup between 6:30-7:00 am (so yes, that means you need to arrive at the ski lodge by this time and will need to leave Banff/Canmore around 5:30 am). You can arrive any time within the window you’ve scheduled. The shuttles leave about every 10-15 minutes. The shuttle to Lake Moraine was about 30 minutes and to Lake Louise was about 20.
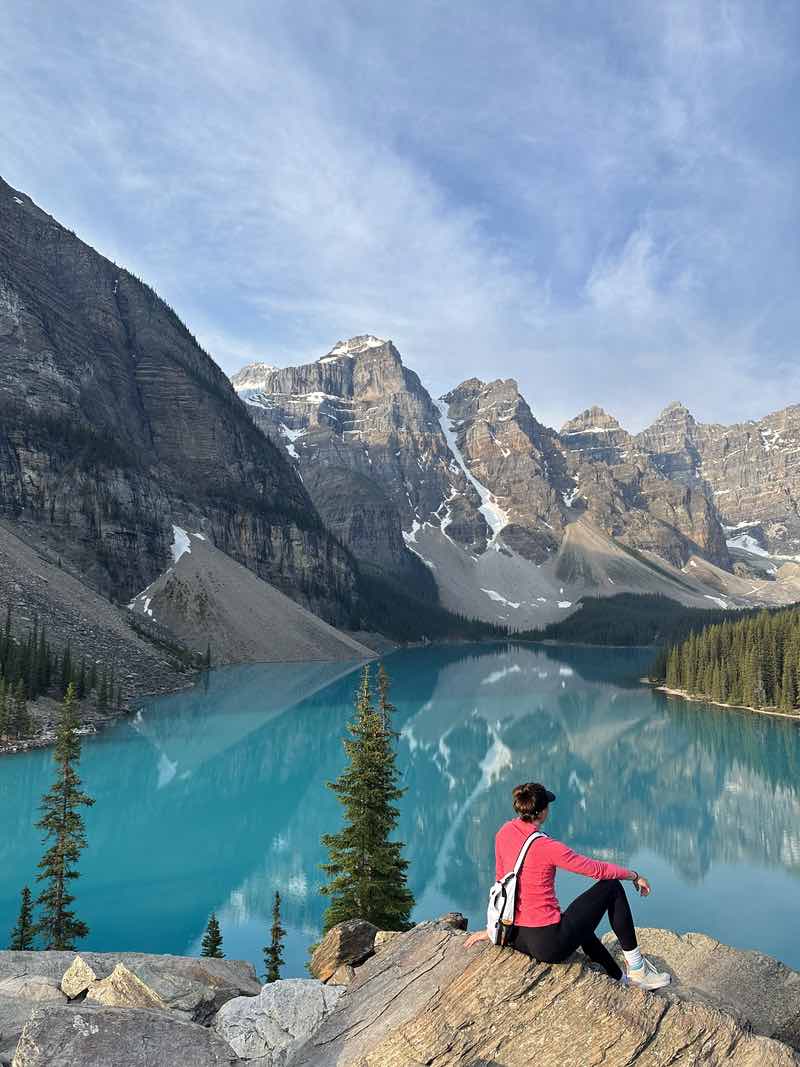
If you are following this itinerary then I would highly recommend going to Moraine Lake first. Lake Louise is by far the busier of the two lakes and by midday (when you would likely be arriving) it is swamped with tourists by the lakeside. However, if you plan to do the suggested hikes, these are much less populated, and by the time you’re on the trails and reach the main lookout spot over Lake Louise, it is very quiet and you will get the best pictures from the top anyway.
The best lookout spot of Lake Moraine is, on the other hand, a short and easy hike to reach, so it becomes much busier and crowded by early morning. Thus, we recommend arriving here first thing in the morning when there are very few people and you will get the best views and pictures. Please feel free to ask if you want more perspective on which lake to visit first.
With that said, if you are visiting Moraine Lake first, plan to arrive at the lake between 7-8 am. Our shuttle arrived around 7:30 am and we thought it was perfect timing.
Hike the Rockpile trail (~10 minutes uphill, but pretty easy). This will bring you to the best views of the lake. Spend a few minutes here getting the best pictures and taking it in – it will get much busier within the next hour. There are a couple of different hiking/activity options from here:
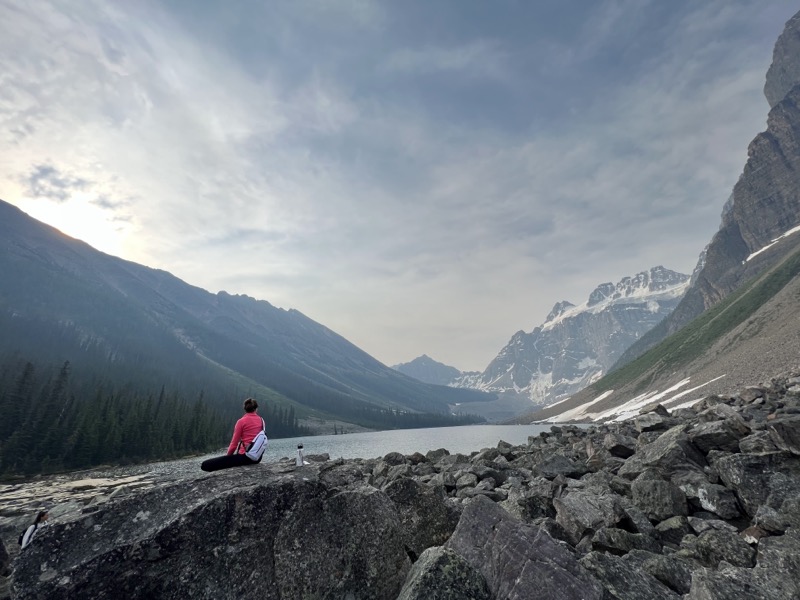
- Option 1: Hike the Consolation Lakes Trail. This trail takes you beyond Moraine Lake to Consolation Lakes. The trail takes you through the woods along a small river until you reach Consolation Lakes, where it opens up to mountain views and has a rocky area to climb on and explore. The hike takes about 45min-1hr to reach Consolation Lakes and is relatively easy (so is ~2 hours round trip). The views aren’t as pretty as Moraine Lake itself, but the hike was enjoyable and the views at the end are still quite pretty, especially when the sun is shining on the lake. You will want bear spray for this hike, and probably your hiking boots too.
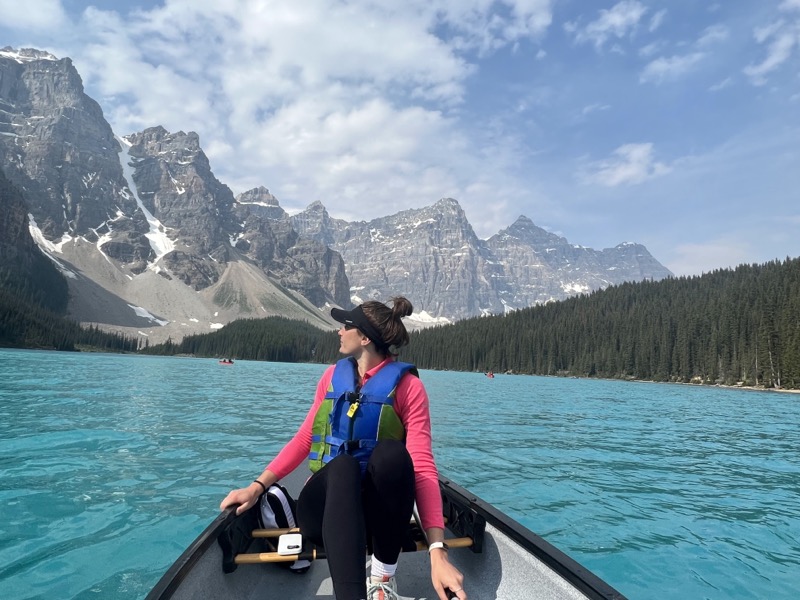
- Option 2: Rent a canoe. A 1-hour canoe rental costs ~$110 USD – it is a little spendy but it is truly beautiful and even relaxing, especially if it’s a calm day. Pack a snack and enjoy it in the canoe. I personally think this is the #1 best location to rent a canoe.
- Option 3: Hike the Moraine Lakeshore trail. This is an out-and-back trail that takes you to the far end of the lake (it is not a full loop around the lake). It takes ~45 minutes to get to the end and then you will turn around and have to walk back. I would only recommend this if you choose not to rent the canoe as you will see the exact same views on this trail as you did from the canoe. However, this is a good alternative hike if you choose not to do the Consolation Lakes hike but still want to get a walk in. The trail is flat and easy.
Consolation Lakes
There is a little cafe at Moraine Lake that offers snacks and coffee if you are interested. Once you wrap up at Moraine Lake, take the free shuttle to Lake Louise (you will need your shuttle pass that you received earlier in the morning). The shuttle takes about 15 minutes.
- Get a Car Rental
- Buy Travel Insurance
- Book Your Accommodation HERE
- Search for Great Tours HERE
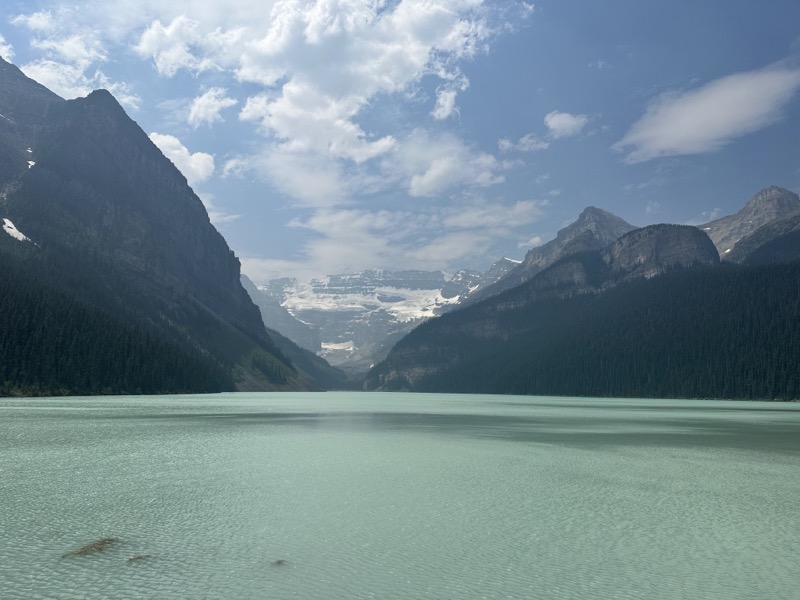
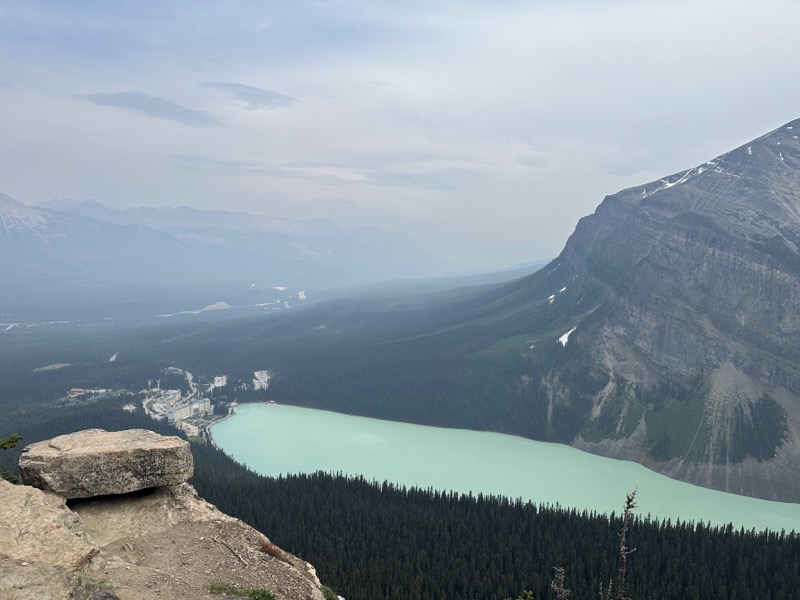
Lake Louise
I would plan to eat lunch once you arrive at Lake Louise. There are limited options for food here, so I would recommend either packing a lunch or eating at one of the lodges (but be prepared to pay a little more than “normal” for your meal). There are a couple of food options at the Fairmont Chateau, otherwise, Deer Lodge (~3min walk) offers lunch as well. There are additional options in Lake Louise Village (a separate area from Lake Louise itself), but if you’re taking the shuttles you won’t be able to easily access these restaurants.
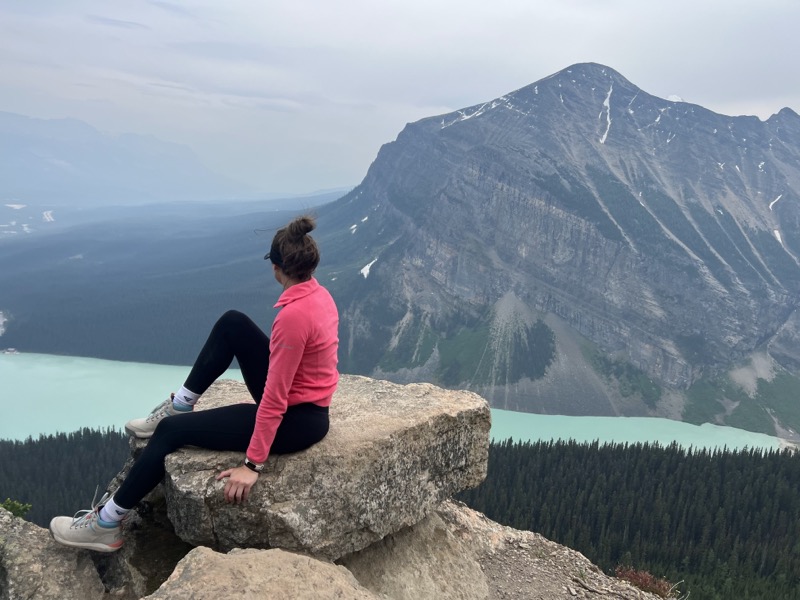
Once you finish with lunch, head to the lake and get a few pictures, then start on your hike. Look for the Lake Agnes Teahouse trail, it is right off Lake Louise just beyond the Fairmont Chateau. This will be your most difficult hike of the entire trip – the trail has a ton of switchbacks and is basically uphill the entire way. It is 2.3km to reach the teahouse.
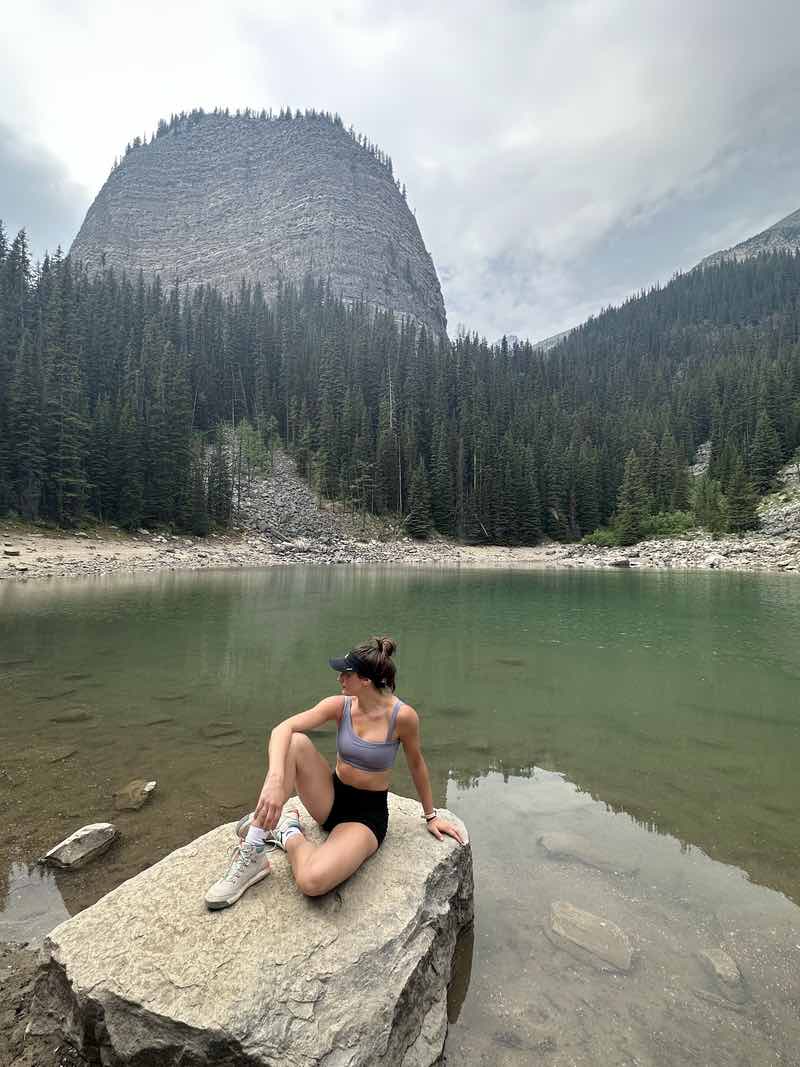
You will pass Mirror Lake on your way (which is ~2.1km up), and then you will have the additional .2km to the teahouse. It took us ~55 minutes to reach the teahouse, and that included stopping at Mirror Lake for about 10 minutes. We did move pretty quickly up the trail and will say it was quite taxing. Plan 60-90 minutes to reach Agnes Lake Teahouse.
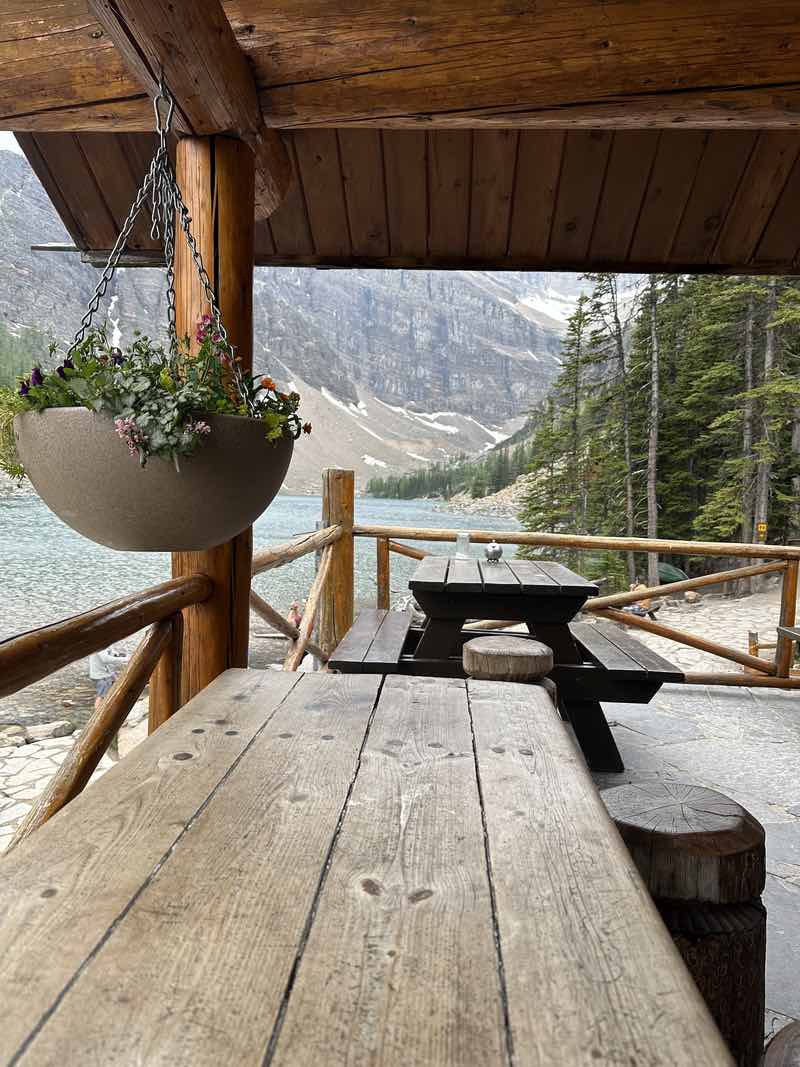
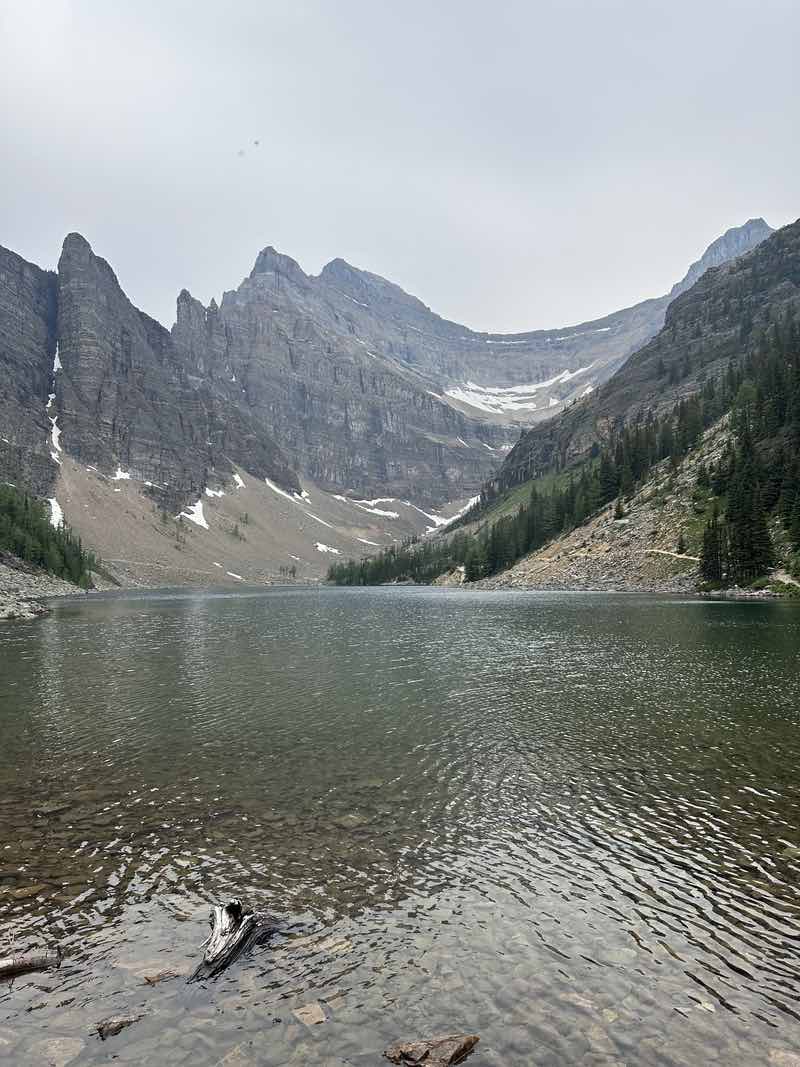
Lake Agnes Teahouse is busiest from 10 am – 2 pm. Eating lunch at Lake Louise will give you a bit of a buffer so that you can arrive at the teahouse (hopefully) after the busy hours. Definitely take advantage and buy a cup of tea and a sweet treat and enjoy the views for a bit (and catch your breath and rest your legs).
If you have enough energy, I recommend continuing on to the Little Beehive hike. This will take you to a beautiful lookout of Lake Louise below. The Little Beehive trailhead is just beyond the teahouse and will take you ~20 additional minutes to reach the lookout. The trail continues to be almost entirely uphill, but the views are absolutely worth it.
You can then continue on to the Big Beehive hike, however, we opted to skip this as it would have added an additional 2-4 hours to the hike and we were already quite tired. The hike down from the Little Beehive lookout took us ~55 minutes. If you’re feeling up to it, you can walk through the hotel and explore a bit, but it’s technically limited to hotel guests only. Catch the shuttle back to the ski resort park and ride whenever you’re ready.
Optional Lake Louise activities
Hike around the lakeshore, rent a canoe, and take the Gondola up to the top (I didn’t do much research on this and didn’t actually see it while we were there, so you’ll have to do your own research if this interests you), have tea or dinner at the Fairmont Chateau (tea is ~$70 USD per person and you will need reservations).
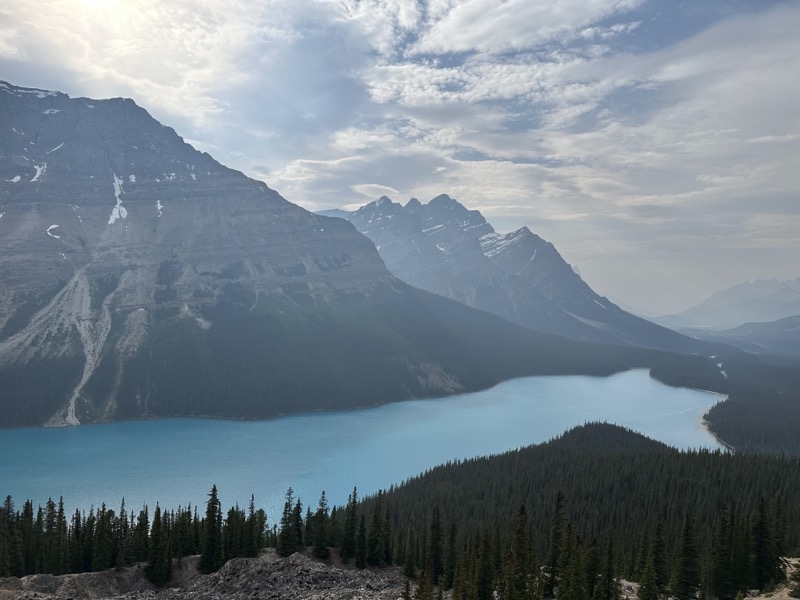
Peyto Lake
Peyto Lake is ~35min drive beyond the Lake Louise ski resort and you will drive the Icefields Parkway to get there. Icefields Parkway is a famous highway and is rated as one of the best drives in the world, but to be blunt, we thought it was quite insignificant. It looks like any other country drives in the Midwest.
Peyto Lake is definitely pretty, but of all the lakes you’ll see it isn’t a “must-visit”. There are hikes (secret Petyo Lake panorama overlook or Bow summit) you could do around the lake that are highly rated, but we were quite tired after the previous hikes and opted for the Peyto Lake lookout point instead. It’s about a 10-minute walk from the parking lot along a paved path to the lookout point. Again, the lake is pretty, but this is definitely one that could be skipped if you don’t have the time or desire.
If you have an extra day or want more hiking, then I would recommend moving this stop to a different day so you’ll have the time and energy for the hikes. The Peyto Lake Panorama overlook takes ~45-60 minutes and the Bow summit hike takes about 2 hours (again, we didn’t do these hikes so I’m not sure how accurate those numbers are).
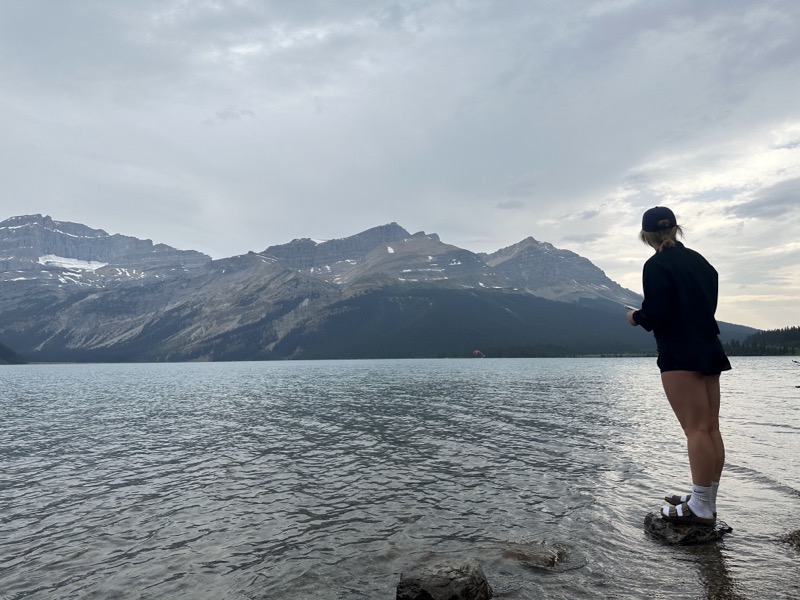
Lastly, you will pass by Bow Lake on the way to Peyto Lake. We pulled off just for a few photos but did not stay long nor hike the lake at all. If you plan to visit Peyto Lake on a separate day for hiking, you may want to combine it with Bow Lake as the lakes are very near each other.
Day 3 – relatively light day
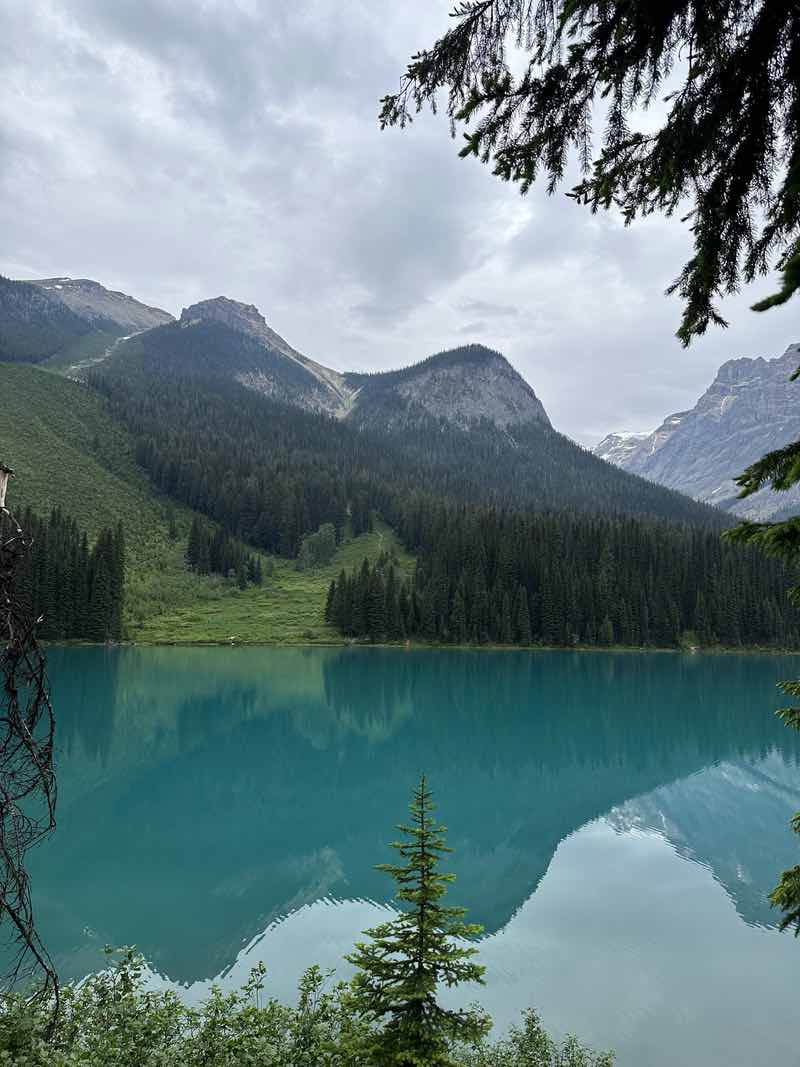
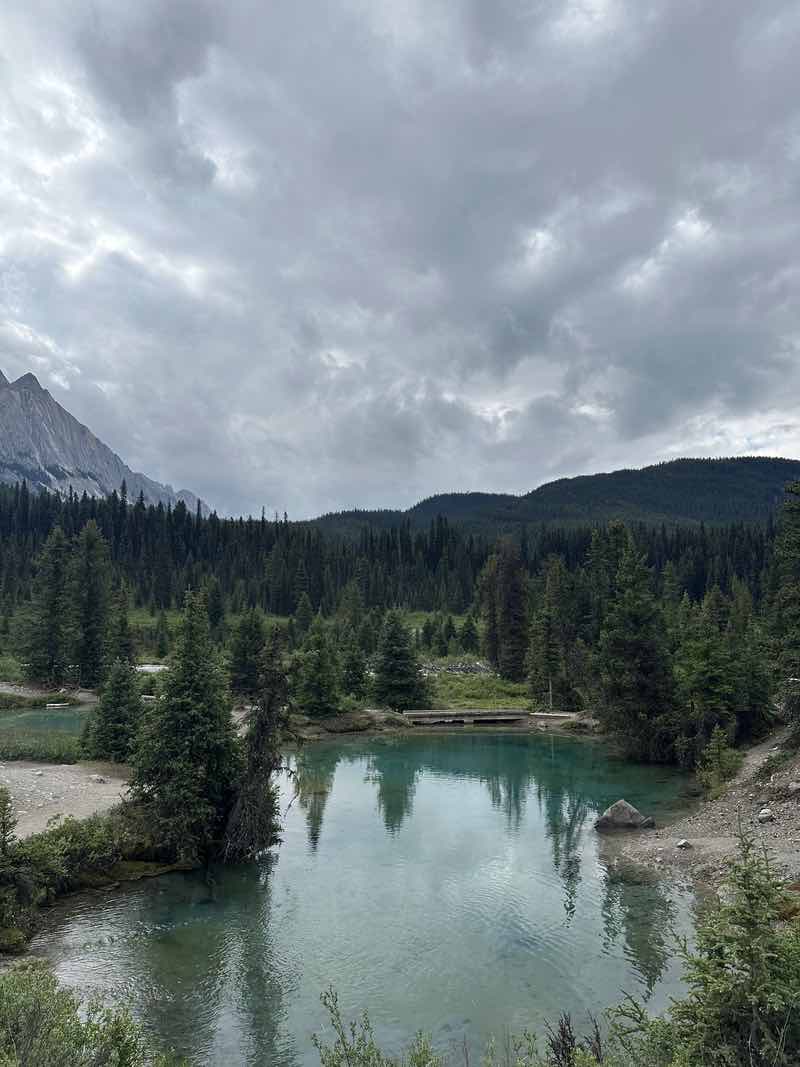
Emerald Lake
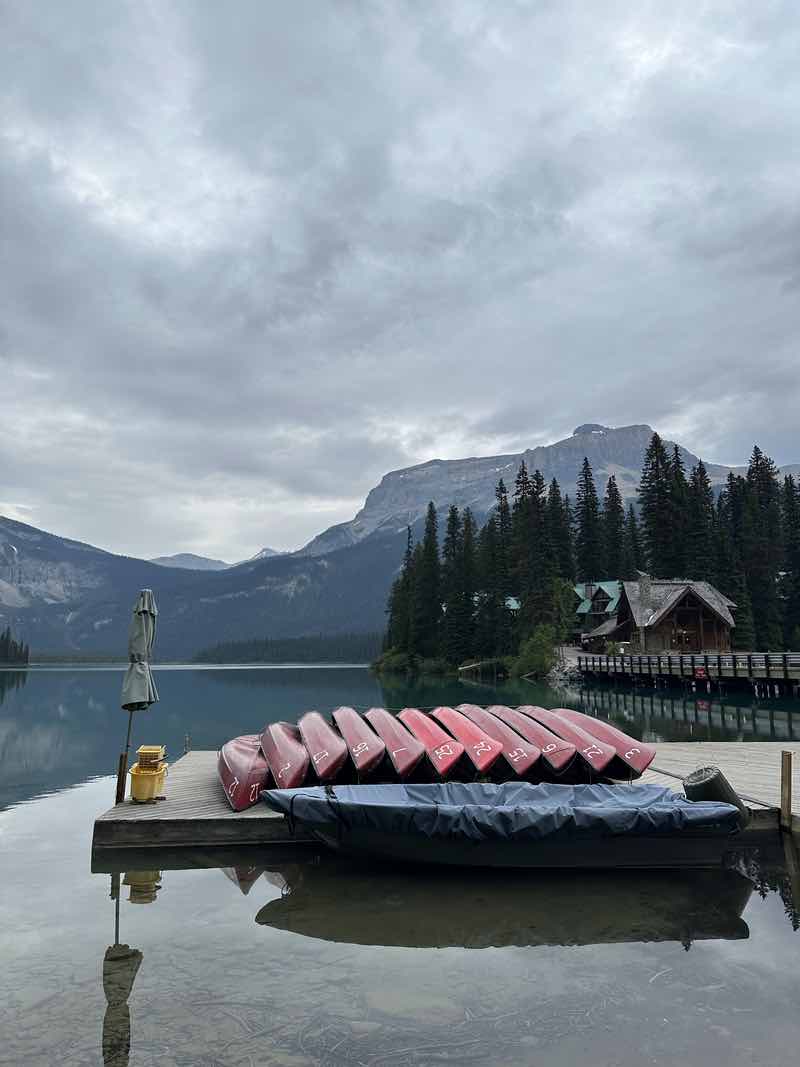
Emerald Lake is a must-visit. Plan to arrive between 7-8 am, it will be quiet and calm and you will get the best pictures. Plan to hike (okay, it’s really more of a walk) the Emerald Lake Loop – this trail is a loop around the entire lake and is very easy as it is mostly flat the entire way. This was probably our favorite hike/walk – the views around the lake are absolutely beautiful.
The trail also has several information plaques along the way that teach you about the surrounding terrain and it’s pretty fascinating. The entire walk around the lake took us a little over an hour. You will want bear spray for this hike. Tennis shoes are sufficient for this hike. There are a few additional/optional activities you could do:
- Hike the Emerald Basin Trail. You will need to hike the Emerald Lake Loop trail to reach the trailhead for the Emerald Basin Trail. The trail is moderate difficulty and would add 1-3 additional hours to your hike. We did not do this hike as we were still a bit sore and tired from the previous day so you’ll want to do your own research to decide if it’s worth it.
- Get a coffee/snack from the cafe or eat at Cilantro (right at Emerald Lake – you won’t miss it)
- Canoe/kayak – This is the #2 best spot to canoe if you’re not able to at Moraine Lake or any of the other lakes. Or heck, why not kayak at Moraine Lake and here both!?

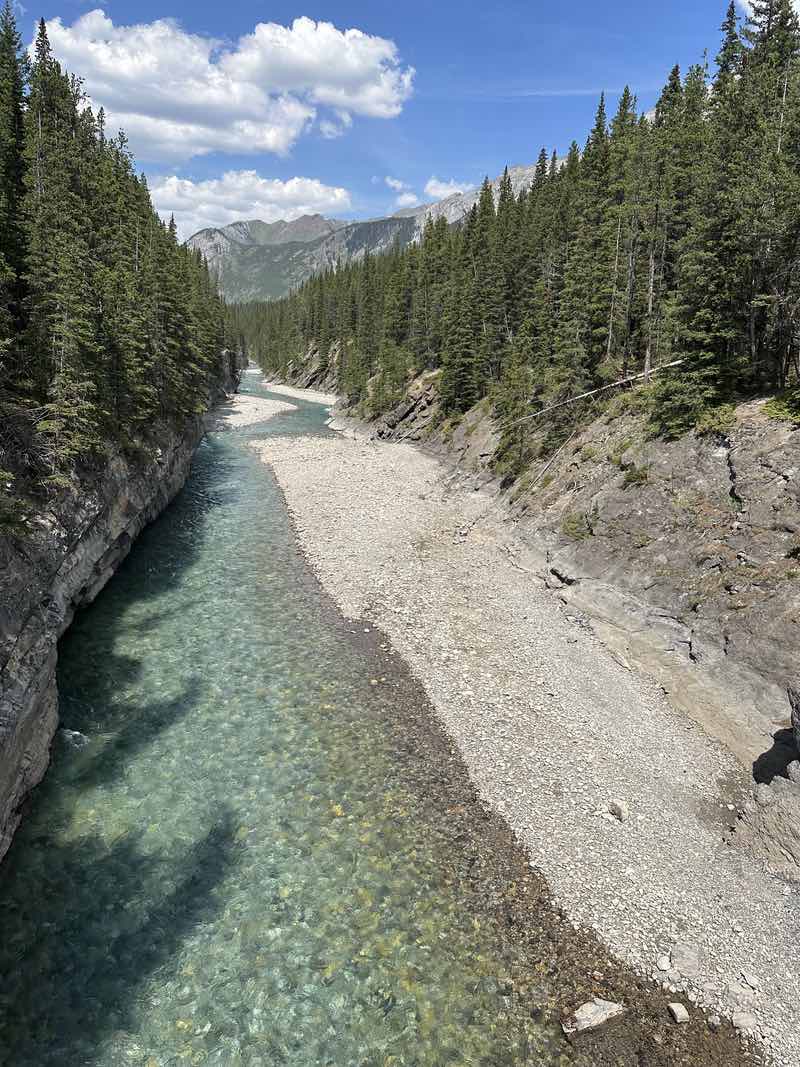
Natural Bridge
Stop at Natural Bridge on your way out of Emerald Lake – it’s about a 3-5 min drive back down the road. It will be a pull-off on the right and it is not clearly marked, so be on the lookout. I would recommend planning about 30 minutes here. If you’re brave you should definitely climb over the barriers and onto the rocks near the spillway. It was pretty cool to get up close to the roaring waters. It was definitely worth the stop but you won’t need a lot of time here.
Takakkaw Falls
Unfortunately, the road to Takakkaw Falls was still closed when we visited (due to snow and unsafe terrain), but if it happens to be open when you visit, see the list of activities below. Keep in mind we weren’t able to do any of these and may not have the most accurate information. You can access Takakkaw Falls from Yoho Valley Road – there will be signs.
Hike to the top of the falls and to the glacier – ~30min easy hike. You may get wet so plan to bring a raincoat.
Hike the Iceline trail. This hike is moderate difficulty. There is a 20km loop that would take 8 hours, otherwise a 14km out-and-back trail. Walk the trail as long as you want and turn around when you’re ready. You will see waterfalls, glaciers, and lakes, however, it is recommended to turn around after the 2nd glacial lake as the views are mostly the same beyond that. If you choose this option it will take you ~4 hours. You may want hiking boots for this so plan to pack them in the car for the day.
Stop at the Kicking Horse lookout – this was pretty insignificant in our opinion. It shows you a train track that goes through the mountains with a bit of accompanying history. We stopped here just to kill some time since Takakkaw Falls was closed, and it only took us a few minutes to drive here from Emerald Lake.

Stop at the Meeting of the Waters (where the Yoho River and Kicking Horse Rivers converge). Walk down to the water for some cool views and pictures. Again, we stopped here to kill some time since Takakkaw Falls was closed and it’s on the same road as the Kicking Horse lookout. We spent ~15 minutes here, I would plan roughly the same amount of time if you choose to stop.
Town of Fields
Stop at Town of Fields if you don’t get coffee/lunch from Emerald Lake. This is about 15 minutes outside of Emerald Lake (either on your way to Takakkaw Falls or back to Banff). Grab a coffee or lunch from The Truffle Pig Bistro and Lodge. Sit outside and enjoy the views – relax finally! If Takakkaw Falls is open you may want to either skip this or grab a coffee to go so you can get started on your next hikes.
Banff Cave and Basin
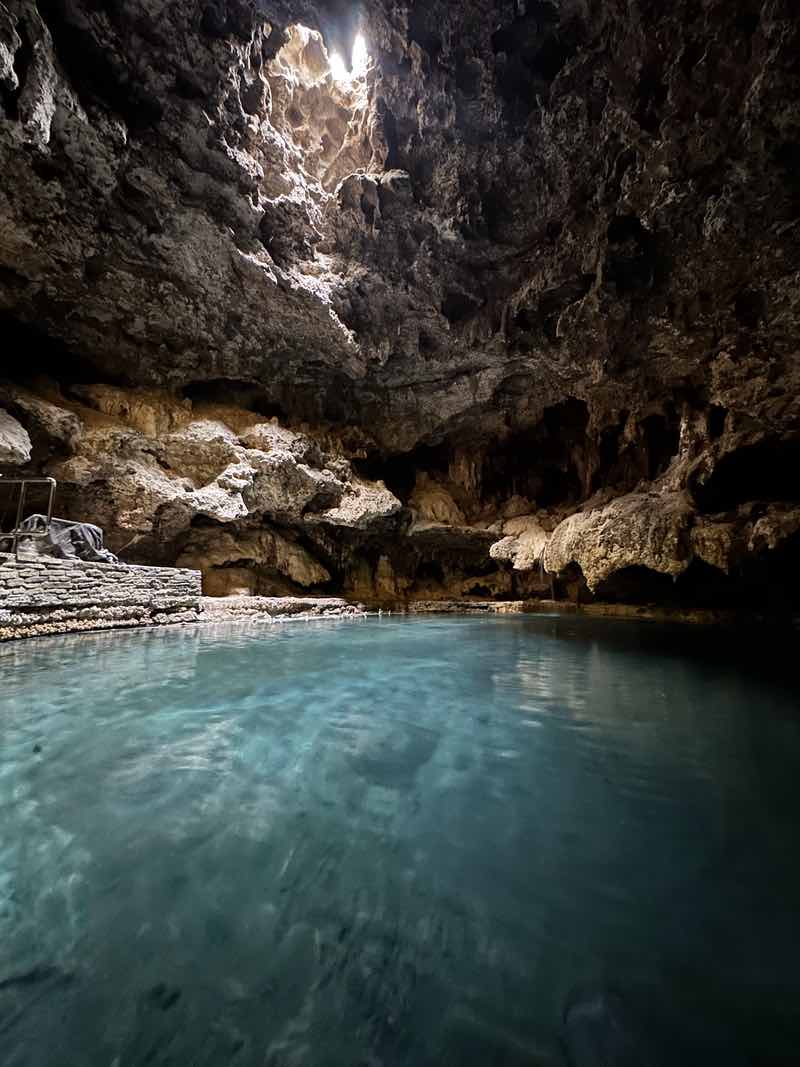
Banff Cave and Basin is located in downtown Banff. Entry is ~$13 USD per person to get in. This is a small museum that tells the history of Banff. There is a small cave with a natural hot spring. The museum has a man-made tunnel that leads to it. The cave and hot spring itself were kind of cool to see, but overall the experience wasn’t worth it to us.
If you’re a history buff and like museums, then you may really appreciate this stop, however, for us, it was pretty insignificant. We needed to fill our time since Takakkaw Falls was closed, but if you don’t have the time to squeeze this in you won’t be missing much.
Explore Banff
We opted to brewery/bar hop since Takakkaw Falls was closed. We spent several hours jumping around downtown Banff and it was actually quite enjoyable. If you have some spare time and energy, definitely spend some time exploring (and people-watching) if you weren’t able to on Day 1. You really can’t go wrong with anywhere you stop.
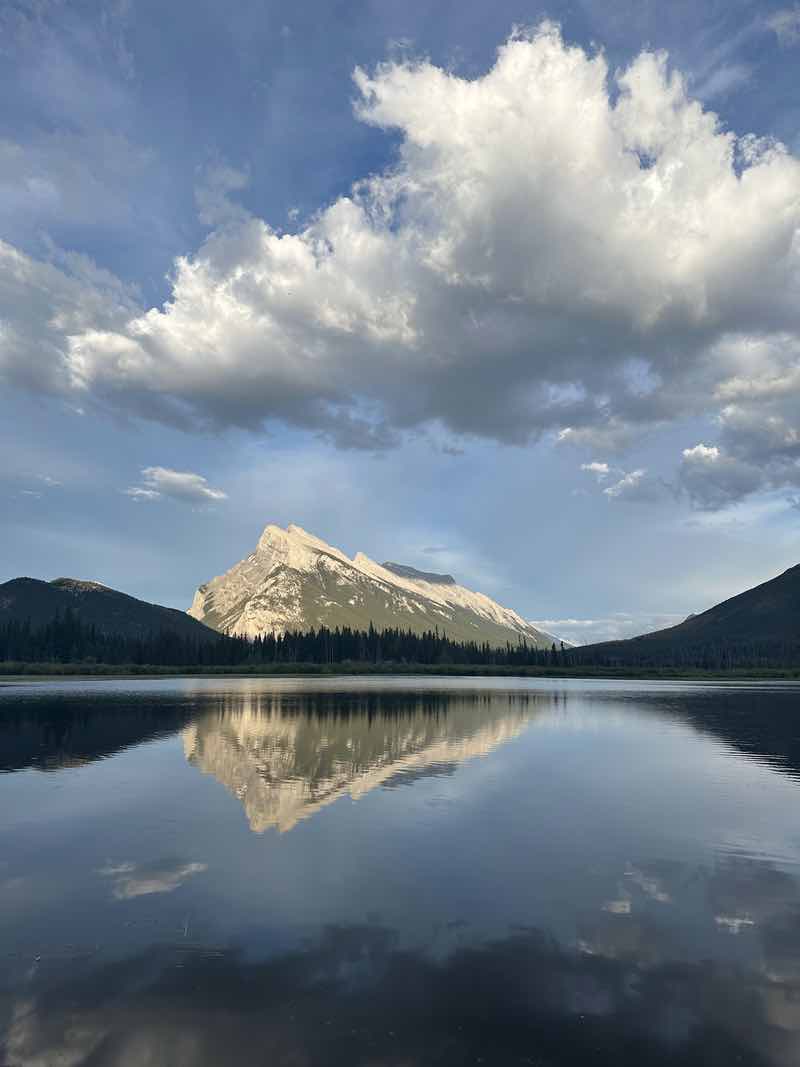
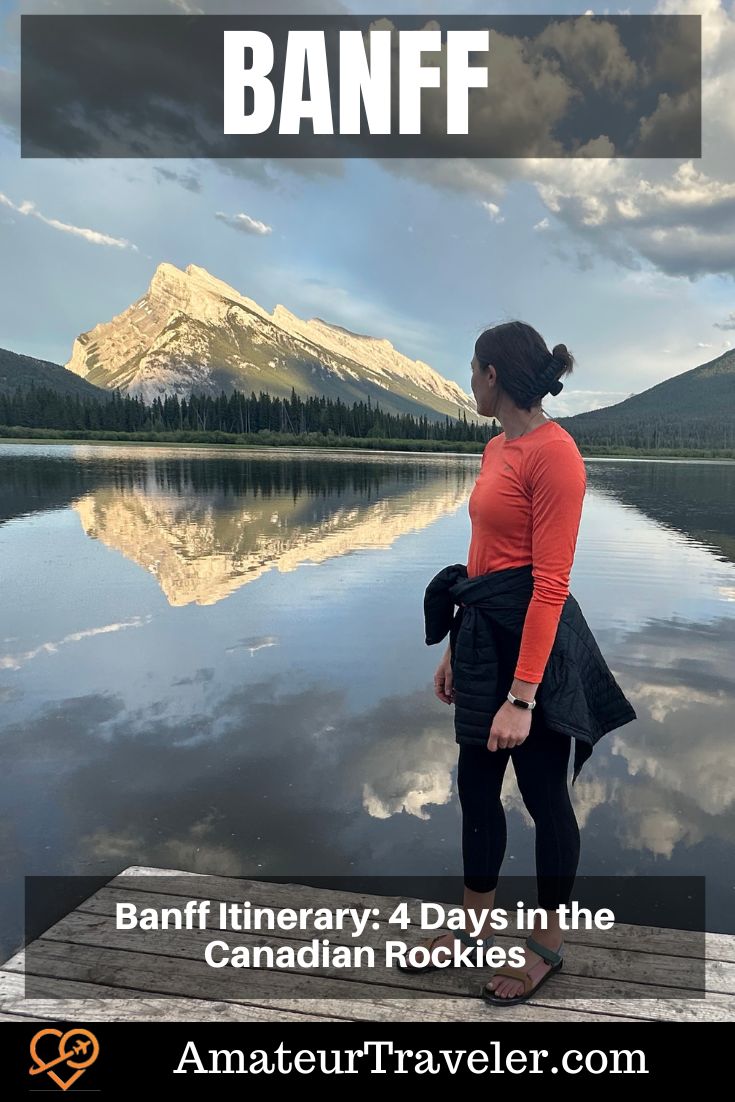
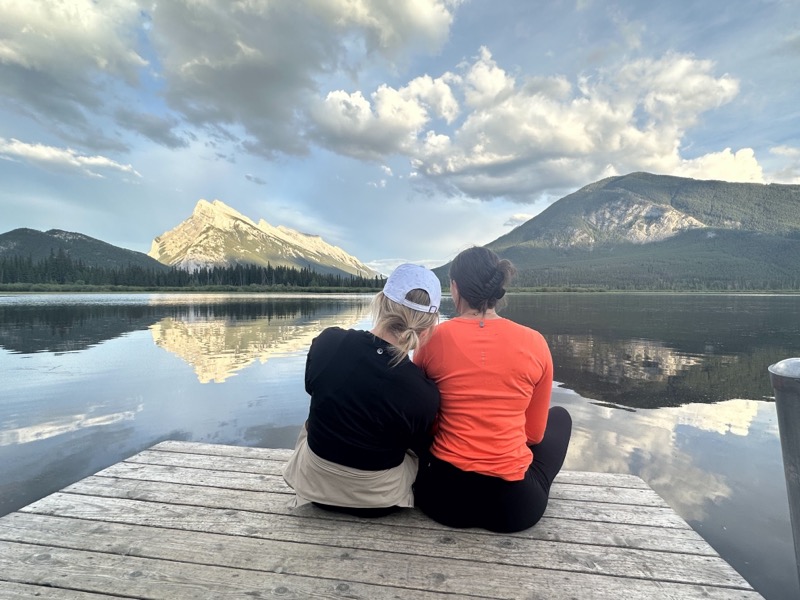
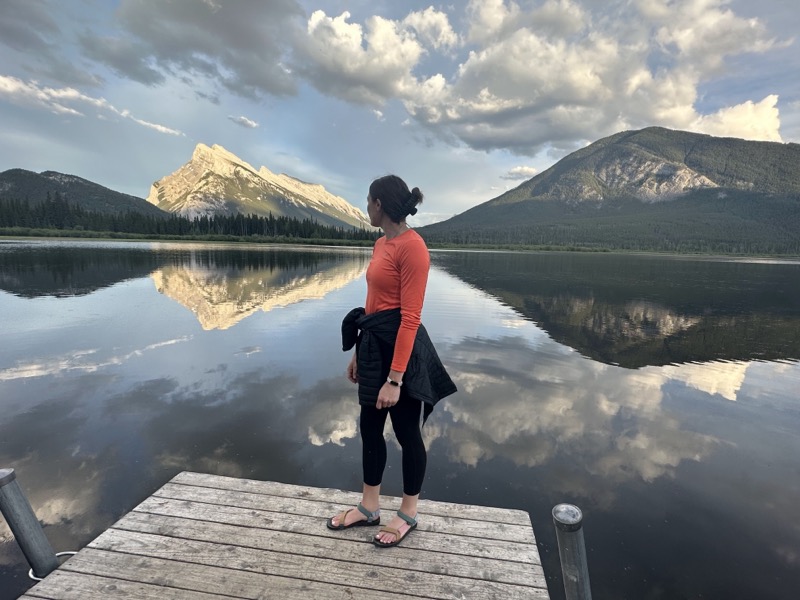
Vermillion Lakes
Go to Vermillion Lakes for a light hike and to catch the sunset. It’s right in Banff, and only takes a few minutes to drive to. Plan to arrive between 7-8 pm. You can park on the side of Vermillion Lakes Drive (road).
Walk the Fenland trail loop – it’s an easy trail that takes you through the woods and takes about 45 minutes to complete. Go hunker down on one of the docks on the lake and watch the sunset on the mountain. I will say it was very buggy, so plan to bring your bug spray. If you plan to watch the full sunset you may want to bring some drinks and snacks. It’s a really relaxing way to end the night and comes with beautiful views.
Day 4 – moderate day
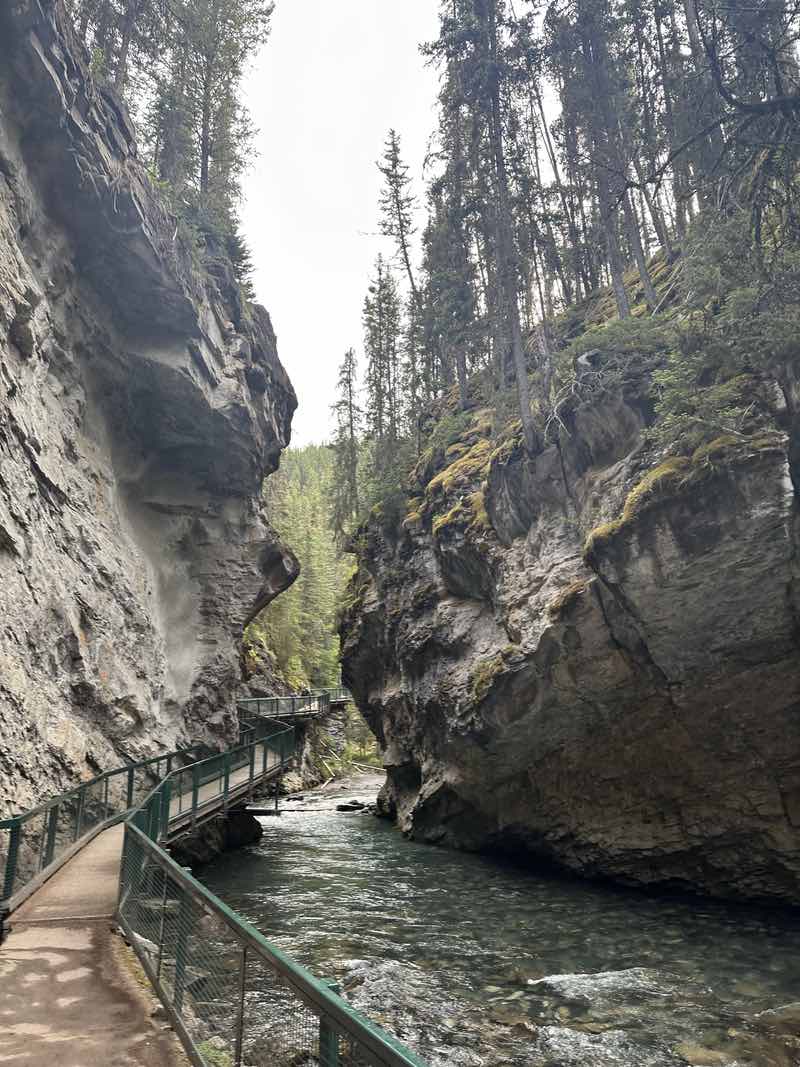
Johnston Canyon
We absolutely loved the hike up Johnston Canyon and would definitely recommend visiting. You will hike through a canyon along a river to several waterfalls. The views are amazing and the canyon hike is relatively easy. Plan to arrive between 7-8 am to avoid the large crowds (definitely think this is crucial as several of the viewpoints are on a narrow, dead-end path, so you may not have the opportunity to get up close if it gets too busy. This will make more sense once you’re there in person).
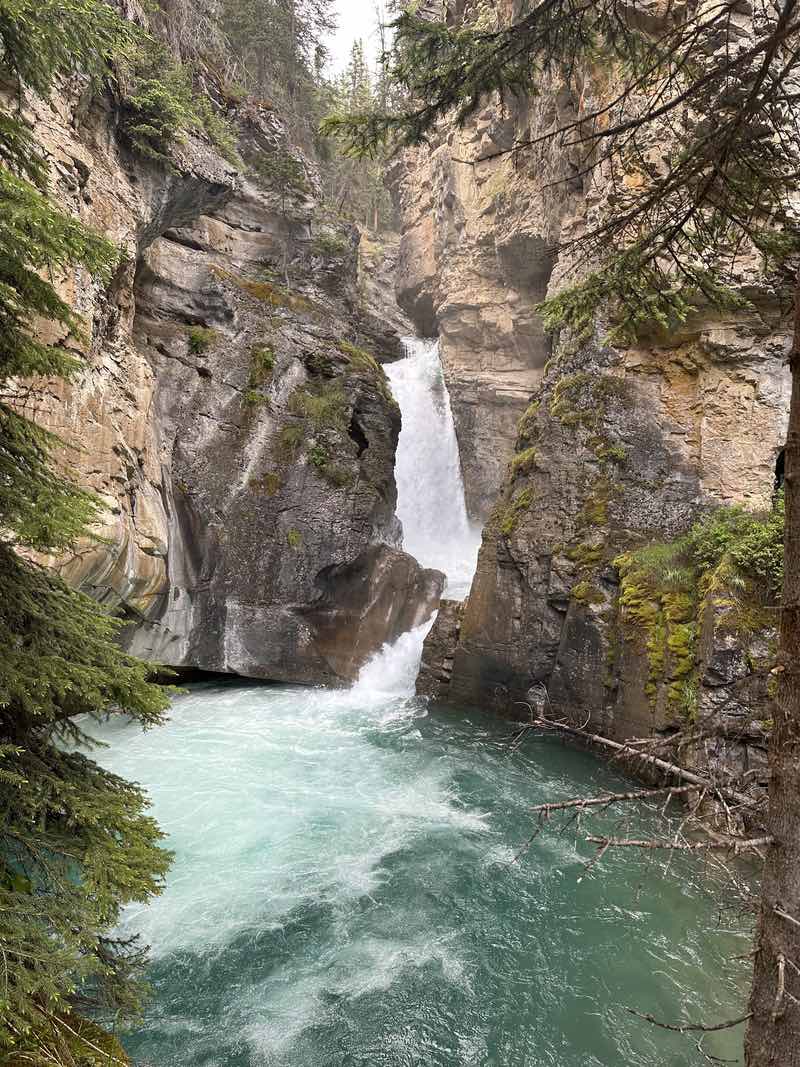
Johnston Canyon Lower Falls
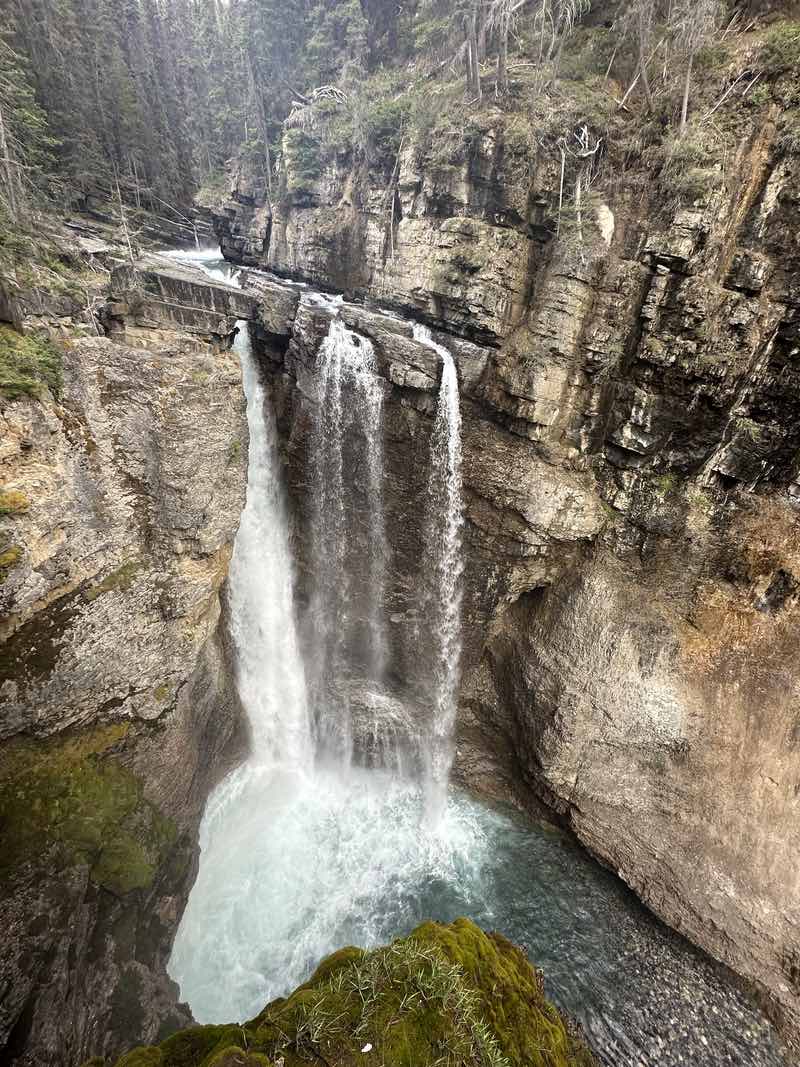
Johnston Canyon Upper Falls
Hike to both the Lower and Upper Falls. It’s ~2.6km to the Upper Falls and will take you ~45-60 minutes. The trail is paved almost the entire way and it is a relatively easy hike. It is damp and cool, so dress accordingly. We wore raincoats. If you’re feeling up to it, continue beyond the Upper Falls to the Ink Pots. This is an additional 3km and will take you about 60-90 minutes to reach the end. The hike is a moderate difficulty – it is uphill the majority of the way but gets easier as you get closer to the end.
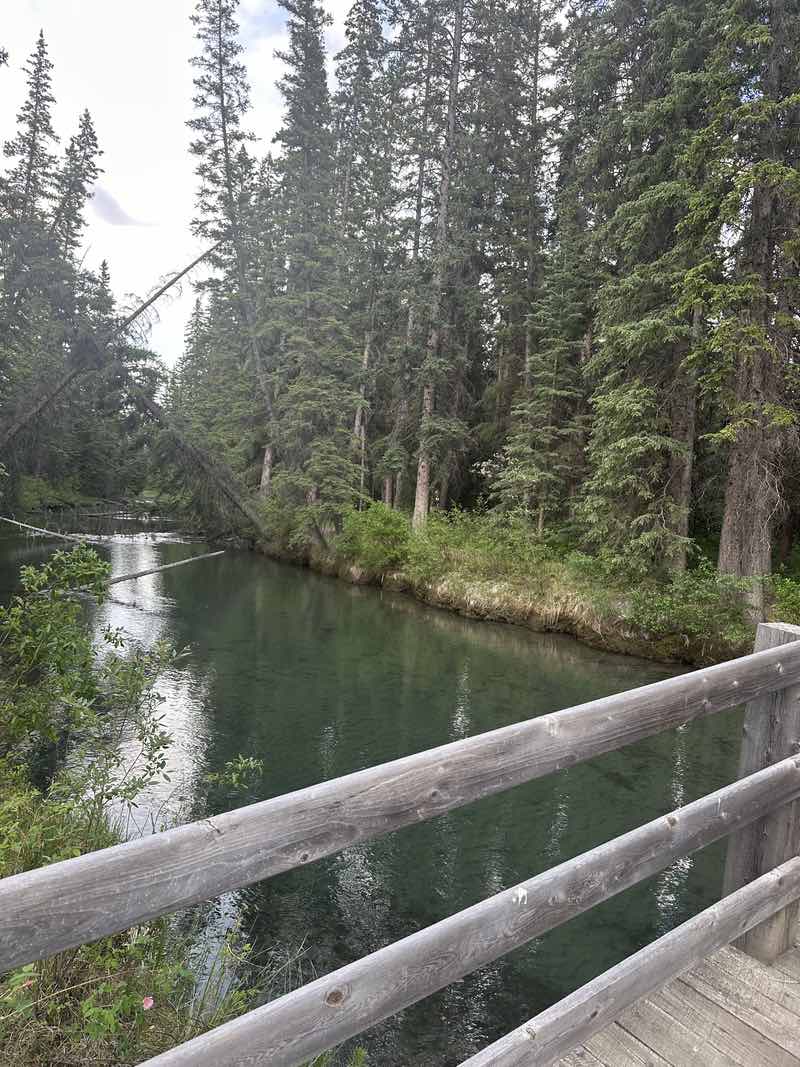
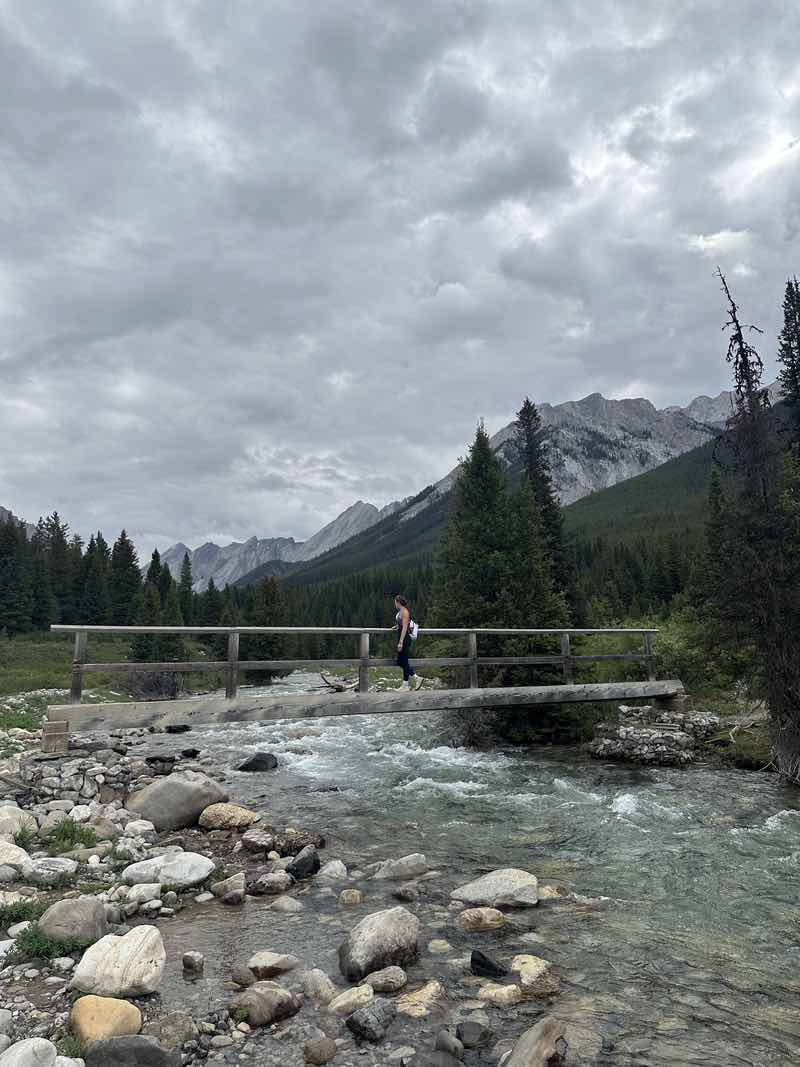
Ink Pots
The trail is almost entirely through the forest until you reach the end, which opens up to the Ink Pots, a river, a cool wooden bridge, and some pretty scenery. The views aren’t the most spectacular, so you may decide it’s not worth it, but for us, we really enjoyed the hike and taking pictures at the bridge. The total round trip from the base of Johnston Canyon to the Ink Pots took us about 3.5 hours. You will want bear spray for this hike, but mostly for peace of mind as the hike was relatively populated.
One more thing – you will briefly drive Bow Valley Parkway to get to Johnston Canyon. This is another famous highway and a recommended thing to see while in Banff. The majority of the highway was closed when we were there, but I would definitely recommend taking this road back to Banff on your way out. From the little bit of it that we saw, it was much prettier than the Icefields Parkway discussed earlier.
From here the rest of the day is yours to decide. I’ve listed some options below:
Johnson Lake (Optional)
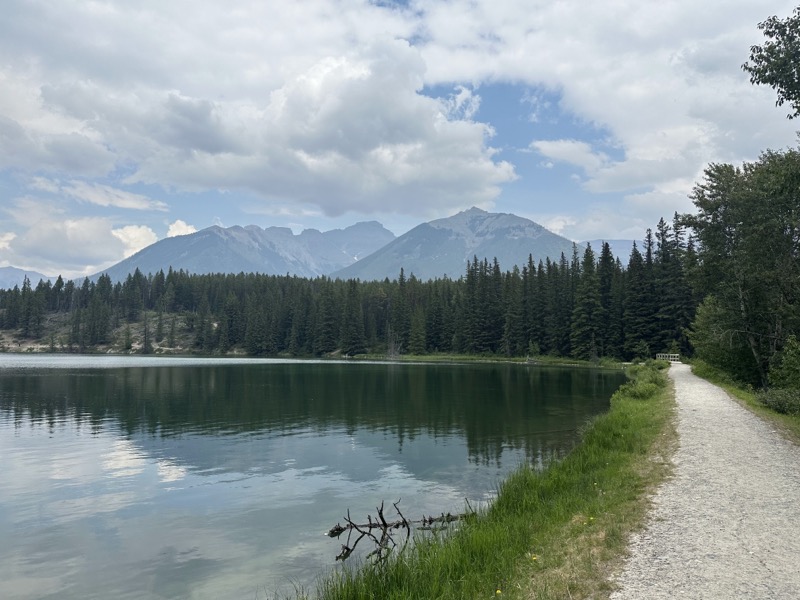
Visit Johnson Lake right outside Banff. I’ve yet to mention this, but most of the lakes in the Banff area are not swimmable as they are glacier-fed and therefore freezing cold. Hypothermia could be induced within seconds. Johnson Lake, however, is one of the few swimmable lakes in the area. The views are nothing compared to what you’ve already seen so you may want to opt out, but if you’re wanting to take a swim or have just one last easy hike/walk, this is the perfect place to visit.
There is a trail that loops all the way around the lake and takes ~45 minutes to complete. Overall we were glad we visited but you aren’t missing much if you choose not to visit this lake. If you decide to come here, you may want to stop in Banff for lunch beforehand, or pack snacks and plan to eat a late lunch after you’re done at the lake. I wouldn’t say bear spray is super necessary as the lake is relatively busy, but again, you may want it for peace of mind. Tennis shoes are sufficient for this trail.
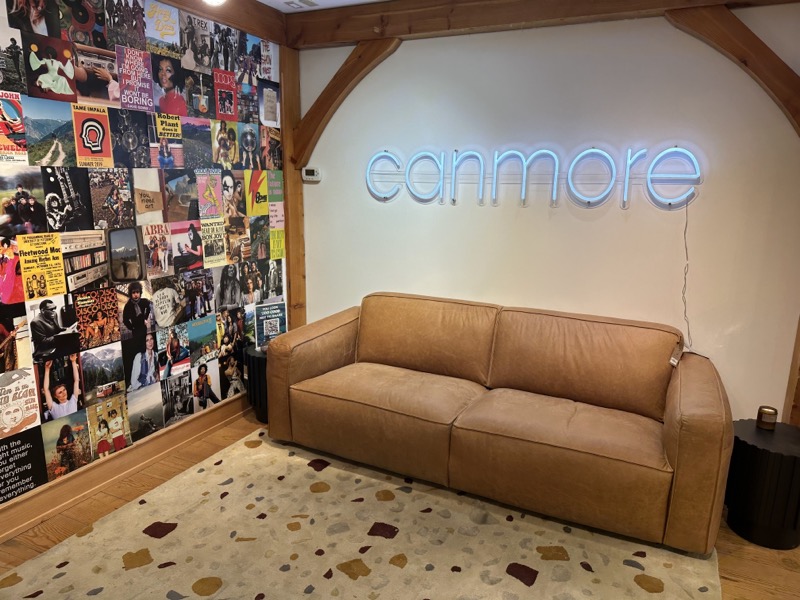
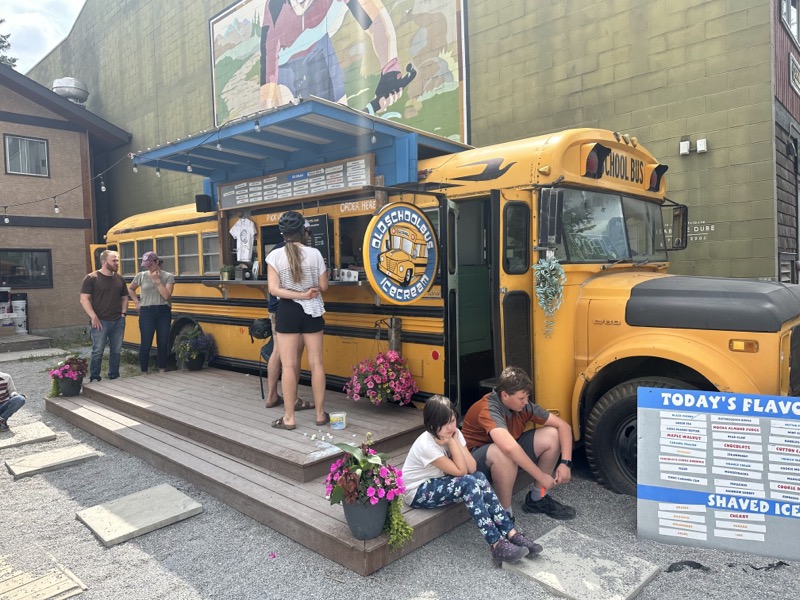
Explore Canmore (Optional)
Spend the afternoon exploring the town of Canmore. There are a ton of cute little shops and restaurants throughout the downtown area. Be sure to check out the Old School Bus Ice Cream shop on 10th Street. Plenty of options for lunch and/or dinner.
There is a secret Canmore swing that overlooks the town, however, you can only access it through a residential area and we did not bother with this. If you want to find the swing, do some Google searching.
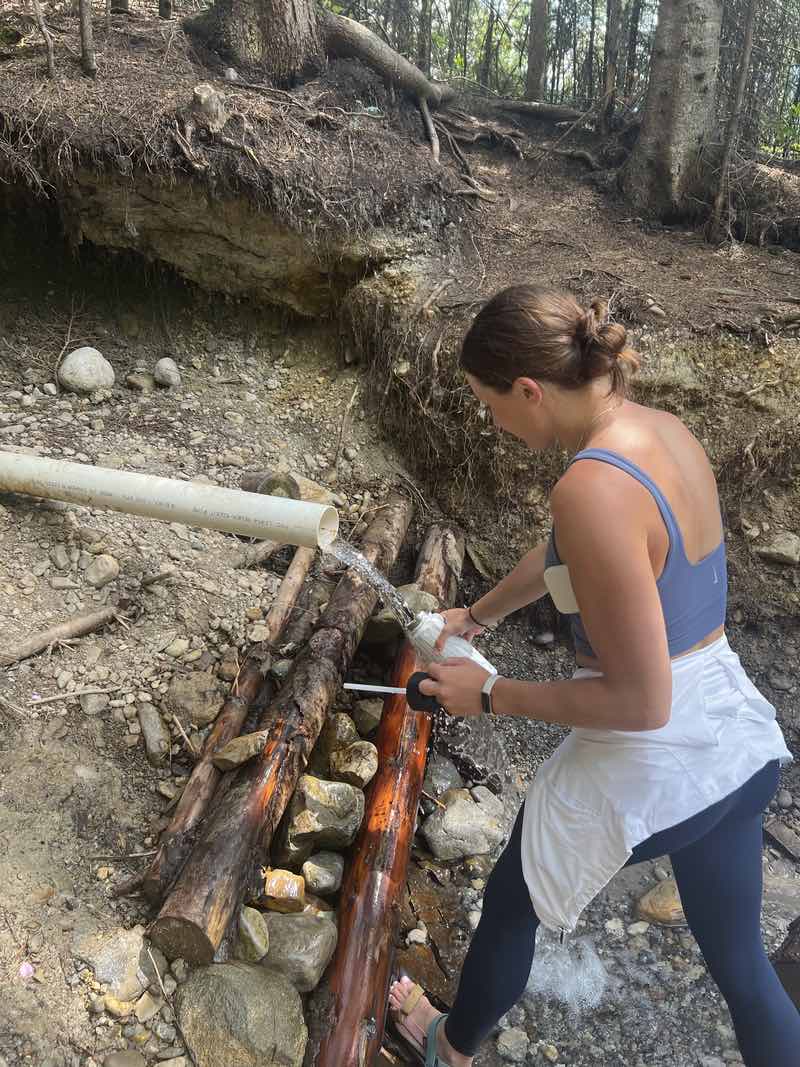
There is also a “secret” natural spring that many Canmore residents use as their drinking water. To find this spring, exit Hwy 1 onto Bow Valley Trail/Pallister Trail and turn north. The spring is just beyond the curve in the road – you will likely see several cars parked on the side of the road. Many residents will bring empty jugs to fill from the spring. If you don’t see any cars or any residents with jugs, look for a rocky “path” that leads up into the woods, there may or may not be a small stream of water flowing over these rocks. Follow the rocks up ~1 minute and you will run into the so-called “spring” (ok yup, it’s literally just a pipe of water running out of the hill). But rumor has it this is the miracle water…

Explore Calgary (Optional)
Spend your evening exploring Calgary. We wound up getting dinner on 17th Avenue here but did not do much exploring. 17th Avenue is a popular street in Calgary – it is filled with plenty of shops and restaurants and has a young adult, artsy feel. Definitely worth exploring if you have the time.
Sunset at Vermillion Lakes
Disclosure
I spent hours and hours researching things to do in Banff – this included blog posts, videos, Pinterest posts, national park websites, brochures, etc. I came up with an extensive list of things to do and wanted to find a way to accomplish them all in the time we had. I was able to fit almost every activity into this itinerary.
Now I will say this itinerary is much busier than any of the others that I read online, however, it was all still very doable and we truly feel like we got the most out of the trip. To be transparent, I’ve included the list of everything there is to do in Banff (based on my research) below and have crossed off the activities that are accomplished or could be accomplished if you follow this itinerary. The uncrossed items at the bottom of the list are those that we were not able to get to, but were also not highly recommended places to visit based on my research.
If they are things that appeal to you, you’ll have to rearrange this itinerary to accommodate them. I’m sure this is not an exhaustive list of all possible activities in the area, but it is a complete list of the most highly recommended and top-rated activities.
Activities
|
|
Banff Tips – Everything else you need to know
Transportation
I would highly recommend renting a car when you visit Bannf. Many of the hikes take an hour or more from Banff. There is public transportation but we didn’t want to be limited to set schedules and crowded hours. You’ll need a rental car in order to accomplish everything on this itinerary.
Lodging
We stayed in an Airbnb in Canmore (a town East of Banff ~20 minutes) as the lodging was significantly cheaper than any option in the Banff area. If you follow this itinerary you will be busy and on-the-go the entire day. We only used our Airbnb to shower and sleep at night. We did not think it was worth it to pay increased lodging costs when we weren’t planning to be there during the days – and we definitely think we made the right decision.
Staying in Canmore did add 15-20 minutes to our drives, but we figured if we were already going to be driving 60+ minutes, we didn’t mind an additional 15-20. The savings we made on the cost of lodging definitely was worth it. If you enjoy relaxing in your Airbnb on your vacation, then you may opt for an option in Banff.
Breakfast
Our Airbnb provided homemade granola and fruit every day. We wound up picking up some yogurts, granola bars, and beef jerky and opted for an on-the-go breakfast each day, which I would highly recommend. To make the most out of the trip, you will want to start your mornings pretty early, and having something light, quick, and easy was definitely the right decision.
Miscellaneous thoughts
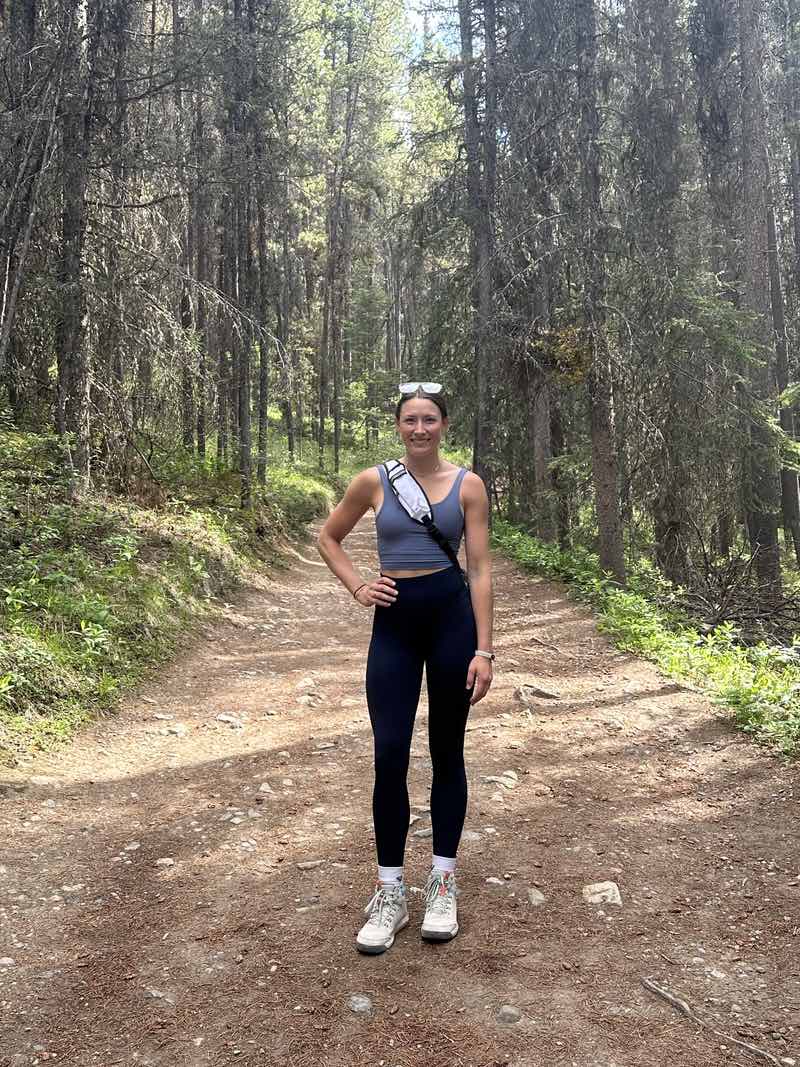
We only packed athletic/hiking clothes (no “cute” clothes) and definitely think this was the right decision. Your days will primarily be filled with hiking and sightseeing. As mentioned above, we never stopped back at our Airbnb during the day, so we did all our activities in the same outfit throughout the day. If you’re someone who likes to get cleaned up for a night or two, then you may opt to pack some nicer clothes but we did not feel it was necessary.
You will want to pack layers – shorts, leggings/sweats, tank tops, lightweight long-sleeve shirts/sweatshirts, and raincoats. It is typically cool in the mornings but warms up significantly by the afternoons.
Bear spray: For peace of mind we highly recommend you get bear spray. You can buy it if it makes sense for you, but it costs between $40-$50 USD and there are very good chances you won’t use it. You also can’t travel with bear spray on a plane. The Home Hardware store in downtown Banff sells it, but you may opt to rent it instead. Snowtips Bactrax (bike shop) in downtown Banff rents it out for ~$10 USD per day. We only rented it out for one day but wish we would have had it every day for peace of mind.
Shoes: You will definitely want to pack hiking boots. Some of the hikes are moderately difficult and you will want sturdy shoes/boots. Not to mention the paths may be dry and dusty or wet and muddy so your boots will most likely get very dirty. We also highly recommend bringing a pair of old tennis shoes. Our feet were sore some of the days and on the easier hikes we opted for our tennis shoes to give our feet a break from the hiking boots. Make sure you bring tennis shoes that you don’t mind getting dirty.
Park passes: You are required to have park passes for pretty much everywhere you go in the town of Banff and nearby areas. You can purchase them online (though this wasn’t super clear to me, so we opted to purchase them once we arrived), at the park gates, or in downtown Banff. I personally recommend buying them at the park gates before you enter Banff. The park gates were not marked very clearly but they are relatively obvious once you come upon them. The road/highway will split into several lanes with a few “hut” like houses – stop at one of these and purchase your passes. For 4 full days our pass costs ~$63 USD.
You won’t have phone service in a lot of areas outside of Banff, including on your hikes. I would recommend turning off your cellular signal (to help save some battery life) during your hikes. We did not find the need to have printed or downloaded maps as most hikes are well marked, but if you’re a map person then you may want to download some maps to your phone ahead of time.
You may want to do some additional research on bear safety. You’ll see people with bear spray, bear bells, speakers, etc. Bears will typically stay away if they hear you coming. From our experience, the most important thing to have was bear spray (again, mostly for peace of mind). Hiking in a group (4-6 people) is also a good idea.
Important things to pack
- Portable charger
- Backpack for hiking (a small one will suffice)
- Water bottle – fill it in the morning before your hikes
- Snacks – you will likely only need a few, we had granola bars and beef jerky
- Bug spray – travel size
- Sunscreen – travel size
- Speaker – optional
Conclusion
I hope this was helpful, but most importantly, hope you enjoy Banff. 😊
-Love, Sydney
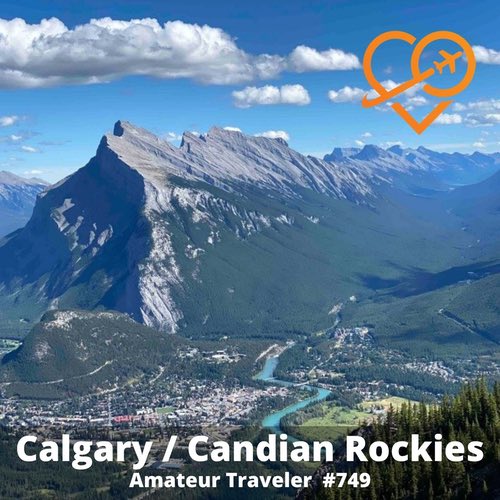 Travel to Calgary and the Canadian Rockies – Episode 749
 Banff & Calgary, Alberta, Canada – Episode 68
 Canadian Maritimes – Free Things To Do
 Travel to Southern Alberta – Episode 404
cindi
Says:May 17th, 2024 at 8:59 pm
well written article
Arjun
Says:July 19th, 2024 at 5:28 pm
I loved how detailed yet precise the itinerary was, Thank you so much!